
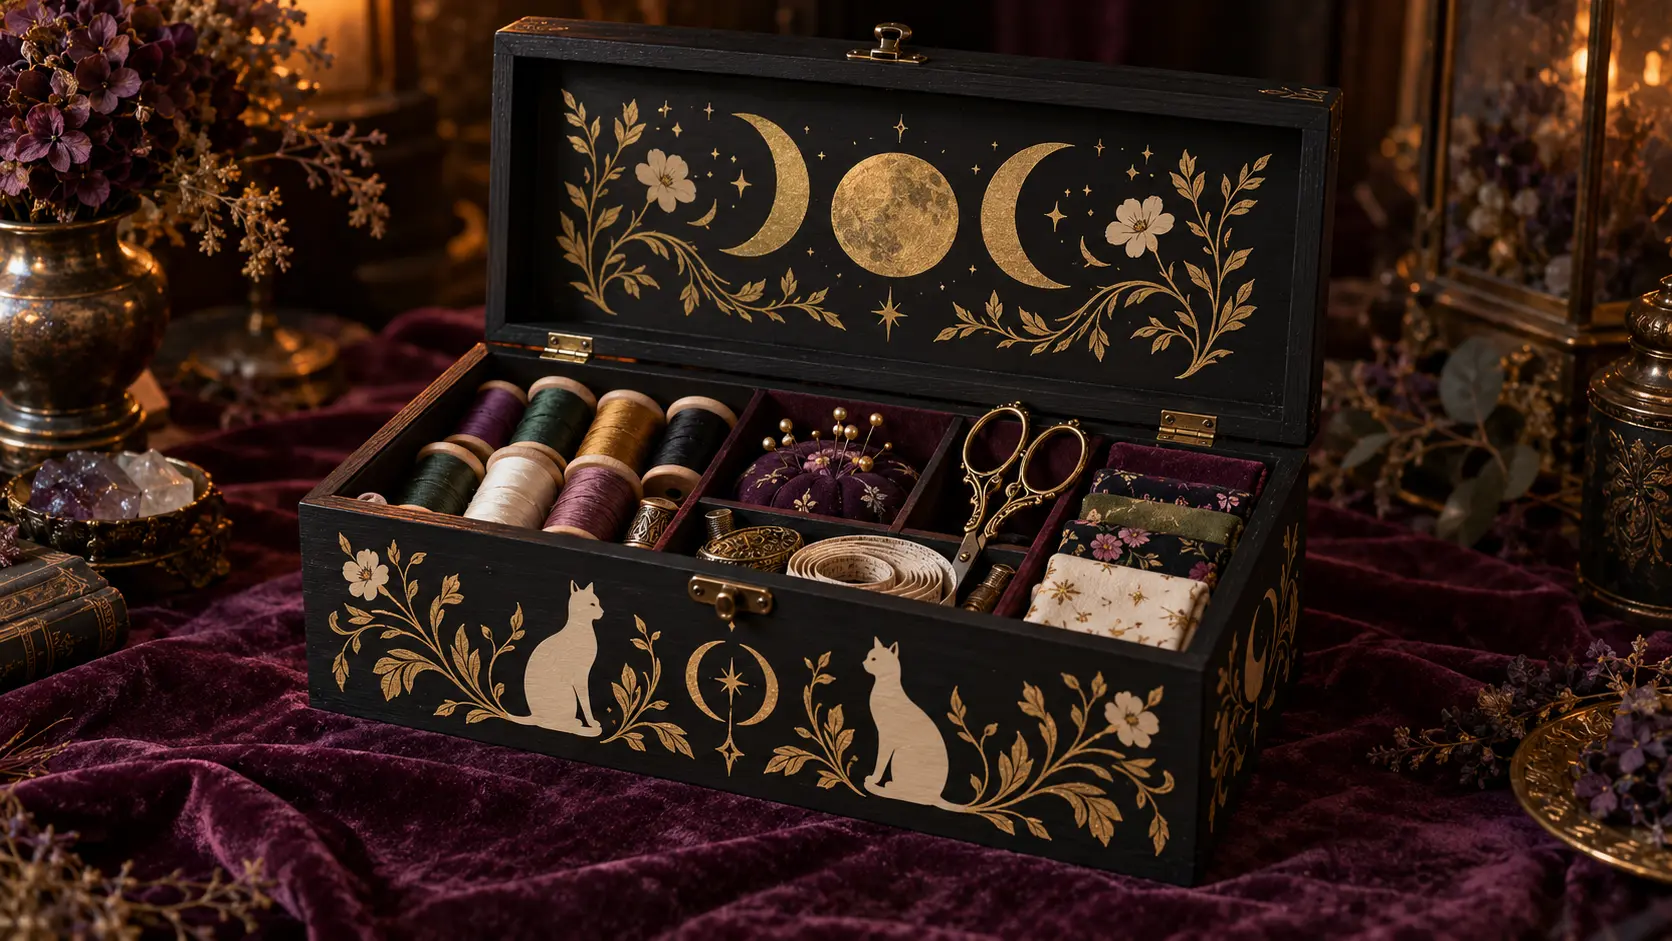
A sewing box earns its place on the worktable when every frequently used tool has a safe, visible home. This project starts with a sturdy unfinished wooden box, adds removable dividers for thread and notions, then turns the lid into a restrained witchy focal point. One broad portrait silhouette supplies the visual anchor; a crescent, small floral shapes, and a narrow antique-gold frame add depth without forcing tiny vinyl details onto a wood surface.
This is an original project plan based on common wood-finishing and pressure-sensitive adhesive-vinyl methods. Wood moisture, grain, filler, primer, paint chemistry, cure time, sealant, vinyl adhesive, transfer tape, blade condition, mat grip, room temperature, and design scale can all change the result. Make paint, vinyl, and removal tests on an offcut or hidden area, follow the current directions from every box, finish, vinyl, cutter, and hand-tool maker, and preserve the purchased artwork while simplifying only duplicate working files. The featured KleanKutChaos pack supplies the character artwork; the featured KleanKutChaos file is the design source for this tutorial, and this tutorial does not claim that the pictured combination was physically tested with the listing files.
What you’ll need
- 7 Sophie Hatter SVG designs from the featured KleanKutChaos listing
- Unfinished wooden sewing or keepsake box about 10–14 inches wide with sound hinges, a secure latch, and no warped panels
- Removable compartment tray or lightweight unfinished dividers sized for the box interior
- Fine- and medium-grit sandpaper recommended for the wood and finish, plus a sanding block
- Wood filler, primer, and water-based craft or furniture paint that are mutually compatible
- Optional compatible clear finish for painted areas only, used exactly as its maker directs
- Matte adhesive craft vinyl in warm cream, antique gold, and optional muted plum
- Low- or standard-tack transfer tape approved for the selected vinyl
- Cricut-, Silhouette-, or similar cutting machine with a sharp compatible fine-point blade
- Clean compatible cutting mat and cutting-machine software with duplicate working files
- Kraft paper, pencil, ruler, low-tack tape, and scissors for a full-size lid proof
- Lint-free cloth, brayer or felt-edged squeegee, weeding tool, tweezers, and bright task light
- Acid-free cardstock or thin craft felt for removable compartment labels or liners
- Small lidded container for pins, needles, blades, and other sharp notions
- Eye protection, dust mask or respirator specified for sanding and finishes, gloves approved by the finish maker, and a lidded scrap container
How to make it
- 1
Inspect the box and plan safe storage
Open and close the empty box several times. Reject loose hinges, splintered edges, a failing latch, or a lid that drops without control. Measure the interior, tray, lid panel, hinge swing, and closure clearance. Reserve a rigid lidded compartment for needles, pins, rotary blades, and seam-ripper caps so sharp items never travel loose.
- 2
Choose a readable lid composition
Select one portrait with a broad hair, hat, or shoulder silhouette and avoid making a collage of all seven designs. Plan the figure at the largest practical size, then add only a simple crescent, two or three floral shapes, and a narrow frame. Keep vinyl clear of hinges, latch hardware, lid edges, recesses, and any area handled repeatedly.
- 3
Make a full-size paper proof
Trace the usable lid panel on kraft paper and mark every hardware and edge exclusion zone. Print or rough-cut the proposed portrait and accents at final size, tape them to the proof, and place it on the closed box. View it upright, flat, and from several feet away; enlarge weak features and remove anything that reads as clutter.
- 4
Prepare duplicate artwork
Preserve the purchased files and edit only duplicates. Delete isolated dots, thin facial hatching, hairline folds, and tiny interior islands that cannot survive the planned scale. Thicken narrow bridges and convert a multicolor plan into a few large, clearly separated shapes. Confirm that every edit and intended use follows the listing license.
- 5
Disassemble only when the maker permits
If the box instructions allow hardware removal, photograph the hinge and latch positions, label every screw, and store parts in a sealed cup. Otherwise mask hardware precisely and work with the lid supported. Never force small screws, strip pilot holes, or paint moving metal joints.
- 6
Sand and repair the wood
Wear the protection and use the ventilation specified for the material. Sand with the grain only enough to smooth raised fibers and sharp corners, then fill approved defects and let the filler cure. Remove all dust with the method recommended by the primer maker; do not apply vinyl over loose dust, wax, oil, or damp wood.
- 7
Prime, paint, and respect cure times
Test the complete primer-and-paint system on scrap or the underside first. Apply thin coats to the lid and box, keeping finish out of hinge barrels, screw holes, lid joints, and mating closure surfaces. Let every coat dry and the final surface cure for the full maker-specified time before testing adhesive vinyl; dry-to-touch paint may still be too soft.
- 8
Prove vinyl compatibility
Apply a small piece of each vinyl color and transfer tape to the painted test area. Burnish with moderate pressure, remove the transfer tape at the recommended angle, and leave the vinyl for the maker's stated settling period. Reject any combination that lifts paint, leaves adhesive, bubbles, slides, stains, or damages the finish during the planned removal test.
- 9
Test-cut the smallest retained details
Cut one eye opening, curl, neckline, flower center, crescent point, and frame corner from the exact vinyl. Begin with the vinyl maker's recommended setting and inspect the cut before unloading. Enlarge, weld, thicken, or delete details that tear, distort, or require aggressive weeding; replacing a dull blade is safer than increasing force blindly.
- 10
Cut and organize the final layers
Cut the portrait, accent shapes, and frame with the proven settings. Weed under bright light and place each color on a labeled backing sheet in application order. Compare every weeded piece with the paper proof, then trim carriers so they can overlap without trapping one another or touching the lid hardware.
- 11
Build a reusable placement hinge
Return the full-size paper proof to the lid and mark horizontal and vertical centerlines with removable low-tack guides approved for the cured paint. Position the largest vinyl layer on its carrier, tape one edge as a hinge, lift it, remove the liner gradually, and lower the vinyl from the hinge outward without stretching it.
- 12
Apply the portrait and accents
Burnish the vinyl through its carrier with overlapping strokes, then peel transfer tape slowly back over itself while supporting fine bridges. Apply the frame and accents one at a time, maintaining visible gaps rather than stacking thick adhesive layers. Stop if the paint lifts or the vinyl refuses to release; do not add uncontrolled heat, solvent, or household glue.
- 13
Organize the removable interior
Fit the tray or dividers without adhesive first and confirm that the lid closes freely. Group thread upright, coil measuring tape loosely, sheath scissors, cap seam rippers, and keep needles and pins in the rigid lidded container. Add flat cardstock or felt labels only where they cannot shed fibers into machine components or interfere with the closure.
- 14
Settle, reassemble, and audit
Leave the decorated box open and unloaded for the full vinyl-settling and finish-cure periods. Reinstall approved hardware in its original positions without overtightening, then test the lid support and latch. Load the box, carry it a short distance over a clear surface, and confirm that tools do not shift, sharp items remain contained, the lid stays controlled, and no vinyl edge catches during normal handling.
Practical finishing tips
- Choose the simplest portrait in the pack and make it large; a broad silhouette looks more polished on wood than many fragile facial lines.
- Keep antique gold as an accent color rather than the main portrait so metallic vinyl does not overpower the cream figure.
- Save the kraft-paper lid proof, blade and cut settings, paint batch, and vinyl labels inside the box for future repairs.
- Round frame corners and leave a generous painted margin around the composition to reduce edge lifting where hands touch the box.
- Use removable trays and dry-fit dividers so the organizer can change as the tool collection grows.
- Store scissors closed or sheathed and return needles and pins to a rigid container before moving the box.
Troubleshooting
Stop immediately. The finish may be incompatible, under-cured, poorly bonded, or paired with tape that is too aggressive. Remove the test material only as the finish maker permits, allow more cure time if specified, and repeat on a hidden area with approved lower-tack tape; repaint the lid if the coating has failed.
Check for grain texture, dust, wax, oil, dampness, soft paint, or an incompatible topcoat. Do not add glue or uncontrolled heat. Let the finish cure, clean only with its approved method, simplify the design, and repeat a small compatibility test; choose a smoother box or alternate display panel if the makers do not support the surface.
Return to a duplicate file, remove hatching and isolated islands, thicken narrow bridges, and enlarge the entire portrait. Replace a dull blade and repeat the smallest-feature test before recutting the full layer.
Pause before burnishing the next piece. Use the saved paper proof and centerline guides, trim carrier overlap, and apply broad layers before small accents. If a vinyl maker permits safe removal from the cured finish, lift the misplaced layer slowly and recut it rather than stretching it into position.
Unload the box and inspect divider height, fabric thickness, trapped tools, screw position, and painted mating surfaces. Shorten or rearrange removable organizers and restore hardware only as the box maker directs; never force the latch or grind structural parts.
Stop carrying the box. Replace the container with a rigid lidded model that cannot open under movement, count loose sharps against the intended inventory, and inspect every compartment and nearby floor before returning the box to use.
Ways to make it yours
Use one oversized warm-cream portrait on a satin-black lid and omit the metallic accents for the easiest cutting and calmest result.
Use a factory-finished or sealed box only when its maker and the vinyl maker confirm compatibility, then repeat the hidden-area adhesion and removal tests before decorating the lid.
Choose a smaller handled box with a secure latch, simplify the artwork further, sheath every sharp tool, and repeat the carry test with the intended lightweight contents.
If adhesive vinyl is incompatible, mount a printed or cut-paper witchy composition behind a separate acrylic or glass insert rather than attaching it directly to the box; keep fragile glazing out of portable versions.
Keep crafting
- DIY Magical Fire Spirit Quilted Book Sleeve With Heat-Transfer Vinyl — Sew a padded, lined book sleeve with a warm fire-spirit motif, a measured flap, and material-specific HTV tests for a practical piece of magical autumn reading gear.
- DIY Gothic Apothecary Drawer Labels With Removable Vinyl — Turn a plain mini-drawer cabinet into functional gothic storage with nine ornate frame decals, readable center labels, and a reusable placement jig.
- DIY Gothic Rose Pressed-Flower Acrylic Frame With Cricut Vinyl — Layer fully dried flowers, a favorite photo, and a bold cathedral-rose vinyl border inside a clear magnetic acrylic frame.
Inspiration & further reading
This is an original Klean Kut Halloween Crafts project inspired by approachable techniques shared across trusted craft and home sources. Explore Cricut vinyl application guidance and Cricut Transfer Tape guidance for more ideas and technique background.