
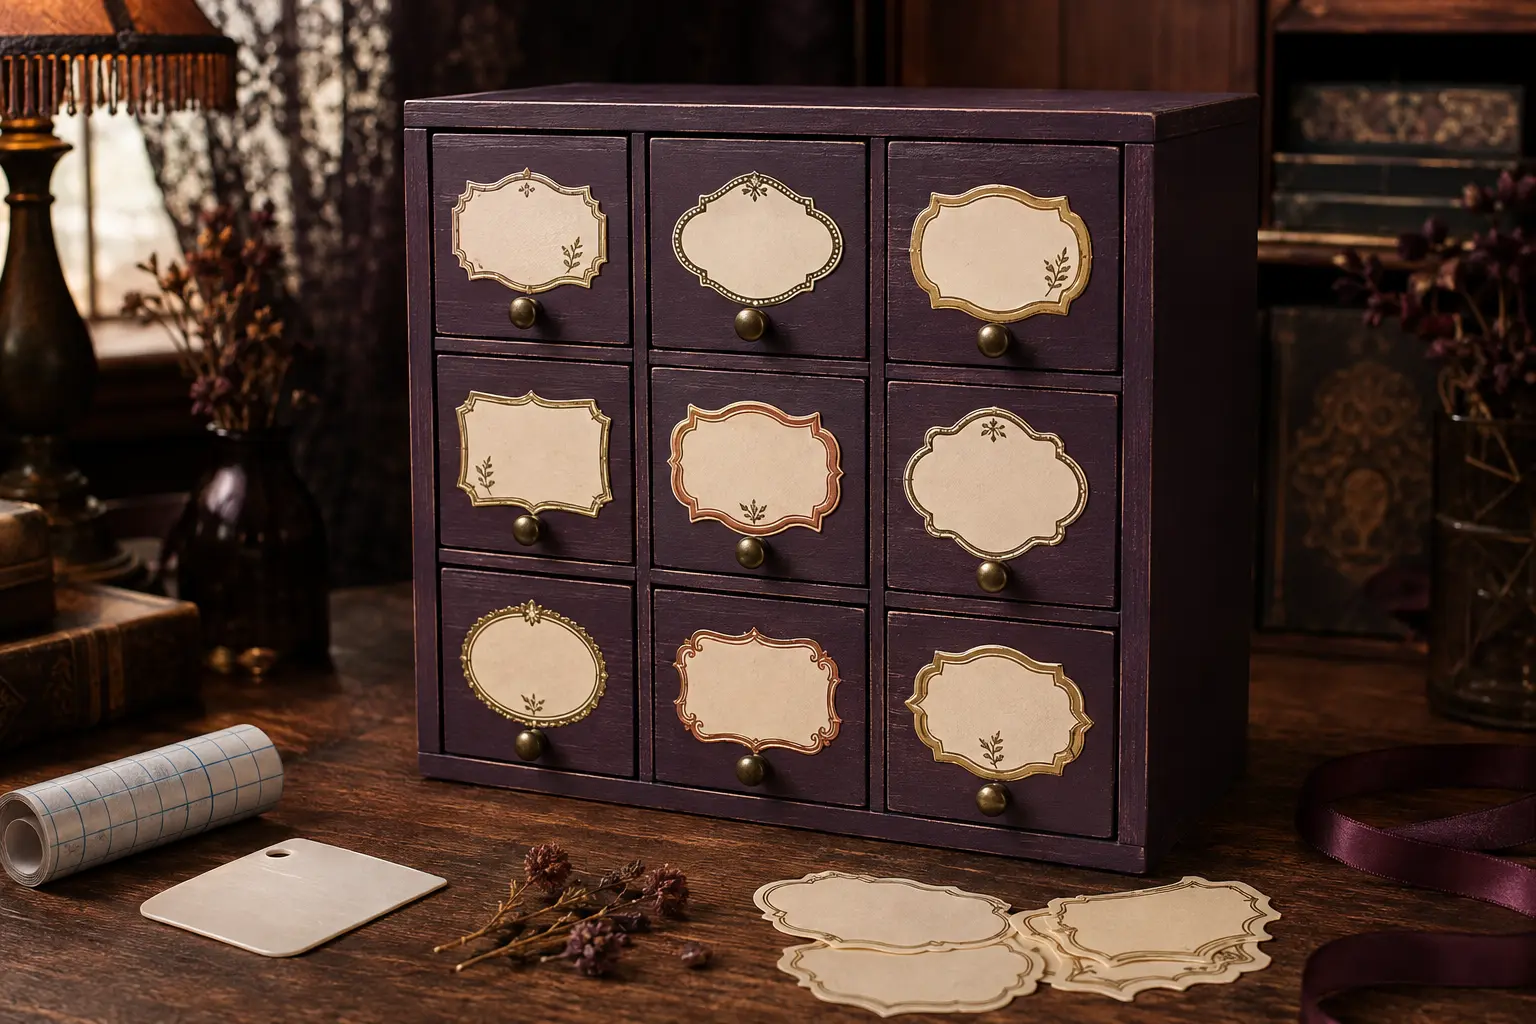
Tiny drawers are perfect for hiding blades, charms, jump rings, label scraps, and all the other supplies that somehow multiply overnight. The Ornate Vintage Frames bundle turns those practical compartments into a coordinated apothecary cabinet: each drawer gets a different floral, scroll, or gothic-arch border while a plain center label keeps the contents easy to find.
This is an original project plan based on common removable-vinyl cutting and transfer methods. Paint, veneer, laminate, sealers, vinyl adhesives, transfer tape, blade condition, humidity, and storage-cabinet finishes vary. Treat the measurements as planning guidance, test every material on your exact cabinet, and follow the current directions supplied with the vinyl, transfer tape, paint or finish, and cutting machine. This specific material combination has not been represented as physically tested.
What you’ll need
- Small desktop drawer cabinet with nine smooth, flat drawer fronts and stable hardware
- 9 Ornate Vintage Frames SVG bundle from the featured KleanKutChaos listing
- Smooth removable adhesive vinyl in cream, muted gold, copper, or another high-contrast color
- Optional matte removable label vinyl for simple center rectangles
- Standard transfer tape matched to ordinary smooth vinyl
- Cricut-, Silhouette-, or similar cutting machine with the blade and mat recommended for the vinyl
- Weeding tool, fine tweezers, scraper, and bright task light
- Plain paper for full-size frame tests and a reusable placement jig
- Ruler, low-tack painter’s tape, pencil, and removable marking tool approved for the cabinet finish
- Finish-safe cleaner, lint-free cloth, and clean water if the cabinet maker permits them
- Fine-tip permanent marker for matte label centers, or simple cut-vinyl words sized for clean weeding
- Optional clear removable laminate patches for handwritten centers, tested with the vinyl first
- Cutting-machine brayer if recommended for the chosen mat and material
How to make it
- 1
Inspect the cabinet before decorating
Remove each empty drawer and check that the cabinet sits flat, the drawer fronts are firmly attached, and the finish is smooth rather than chalky, waxed, oily, peeling, or deeply textured. Tighten only the hardware the maker says is adjustable. Photograph the drawer order and mark the backs lightly so every drawer returns to the same opening.
- 2
Assign a useful label system
Decide what the nine drawers will hold before opening the cutting software. Keep names short—such as Blades, Charms, Pens, Clips, Wax, Ribbon, Tags, Tape, and Scraps—so the finished labels remain readable. Group similar supplies by row and reserve one flexible category for items that change with the season.
- 3
Measure the true label area
Measure the flat portion of every drawer front, excluding pulls, bevels, seams, and the clearance needed for fingers. Use the smallest shared rectangle as the maximum label area. On a drawer about 3 inches wide, a finished frame near 2.25 to 2.5 inches wide often leaves a safer margin than an edge-to-edge decal, but size from your actual cabinet.
- 4
Choose nine cut-friendly frames
Import the frame bundle and select designs with strokes and interior openings that survive at drawer-label size. Keep the original proportions locked. If a floral curl or hairline becomes narrower than your vinyl and blade can reliably cut, enlarge the frame, simplify only a nonessential isolated detail, or choose a bolder frame rather than forcing a fragile cut.
- 5
Build a consistent digital layout
Place each ornate frame inside a rectangle matching the shared drawer-front area. Align the frames by their visual centers—not only their bounding boxes—so a tall arch and a wide floral frame feel balanced together. Add a plain center rectangle for handwriting, or set short label words in a sturdy font with letters large enough to weed cleanly.
- 6
Rehearse all nine labels on paper
Cut the frames from plain paper or print them at full size, then tape one to each drawer. Step back three to six feet and check the row rhythm, label readability, pull clearance, and margins. Open every drawer to confirm that no paper edge catches the cabinet. Revise the digital sizes now, before vinyl is used.
- 7
Test the finish and removal plan
Apply a small scrap of the exact removable vinyl to a hidden finished area. Leave and remove it only as the vinyl and cabinet makers direct. Confirm that it adheres without staining, dulling, or lifting paint or veneer. If the finish reacts, stop and switch to removable cardstock tags, label holders, or another non-adhesive method.
- 8
Clean and stabilize the drawer fronts
Use only the cabinet maker’s finish-safe cleaning method; harsh alcohol, ammonia, oils, and furniture polish can damage finishes or prevent adhesion. Let the fronts dry completely. Return the empty drawers to the cabinet and brace the unit so it cannot slide while you position the decals.
- 9
Run a test cut, then weed slowly
Use the vinyl maker’s recommended setting and cut one frame first. Check that corners lift cleanly while fine details stay on the liner. Adjust pressure or blade condition only within the material guidance, then cut the remaining frames with extra space between them. Weed from broad areas toward curls and flowers, supporting narrow pieces with tweezers instead of pulling quickly.
- 10
Make a reusable placement jig
Cut a paper rectangle the size of one drawer front and remove a centered window matching the intended frame area. Mark its horizontal and vertical centerlines. Tape the jig lightly to each drawer in turn; this gives nine consistent margins even when the frame silhouettes differ.
- 11
Transfer each frame from the center out
Apply standard transfer tape and burnish the vinyl from both sides. Position the frame through the jig, anchor its center with a low-tack tape hinge, then lower and burnish outward in small strokes. Peel the transfer tape back at a low angle. Stop and reburnish any lifting scroll before continuing rather than stretching it into place.
- 12
Add readable centers and let them settle
Place a plain matte label rectangle inside each frame and hand-letter it, or transfer the pre-cut word after the border is secure. Keep text clear of ornamental edges. Let the vinyl rest for the period specified by its maker, then reload the drawers lightly, open each one several times, and trim no vinyl with a blade against the finished cabinet.
Practical finishing tips
- Cut ornate borders and plain center labels as separate layers; replacing one handwritten category should not require recutting the decorative frame.
- Use one vinyl color across all nine frames and change only the frame shapes—the repeated color keeps a busy cabinet from looking chaotic.
- Photograph the finished cabinet and keep the image with your supply inventory so drawer contents are easy to restore after a deep clean.
- If identical margins look uneven, trust the eye: tall arches may need to sit a millimeter lower than round floral frames to appear centered.
- Keep the tiniest weeded vinyl scraps on a folded piece of painter’s tape so they do not migrate to pets, fabric, or the finished drawers.
Troubleshooting
The frame is too small, the blade or setting is not suited to the vinyl, or the cut includes details thinner than the material can support. Enlarge the frame or choose a bolder design after a fresh test cut instead of piecing torn curls back together.
Place the decal face down, burnish the liner side again, and peel the liner away from the vinyl at a low angle. After application, peel transfer tape back over itself slowly. Strong-grip tape can be too aggressive for ordinary smooth vinyl.
If the removable vinyl is still within its repositioning window, lift it only as its maker permits and realign it with the paper jig. If it has stretched or the finish seems stressed, remove it safely and recut rather than tugging individual corners.
Check for texture, polish, dust, curves, or a drawer pull forcing the decal too close to an edge. Clean only with the finish-safe method, let the surface dry, and recut a slightly smaller, bolder frame. Do not seal removable vinyl under an incompatible clear coat.
Increase the contrast and simplify the center. Replace tiny script with a plain matte rectangle and short block lettering, or use a small botanical symbol plus a color dot for categories that change often.
Ways to make it yours
Use each row for a material family—cutting tools, jewelry findings, and paper supplies—and match the labels to a written inventory kept nearby.
Leave the centers wordless and add one sturdy leaf, moth, moon, or mushroom symbol inside each frame for a decorative specimen-drawer look.
Use removable matte centers for playful names such as Moon Dust or Bat Wings, then swap only the center rectangles after Halloween.
Apply the same frame system to lightweight wall drawers only when the cabinet and wall-mount hardware are designed for that use and installed according to their rated instructions.
Keep crafting
- DIY Gothic Rose Window Mirror With Vinyl — Turn a thrifted mirror into a cathedral-inspired rose window with black vinyl, an antique-gold frame, and a clean reflective center.
- DIY Gothic Witch Book Box With Vinyl & Metallic Paint — Turn a plain book-shaped wooden box into an aged black, plum, and gold keepsake with an ornate witch cameo on the cover.
- DIY Dark Fantasy Shadow Warrior Acrylic Wall Clock — Build a dramatic working wall clock from a predrilled acrylic blank, a shadow-warrior cut file, clean hour ticks, and carefully aligned adhesive vinyl.
Inspiration & further reading
This is an original Klean Kut Halloween Crafts project inspired by approachable techniques shared across trusted craft and home sources. Explore Cricut Vinyl preparation and application guide and Cricut Transfer Tape Instructions for more ideas and technique background.