
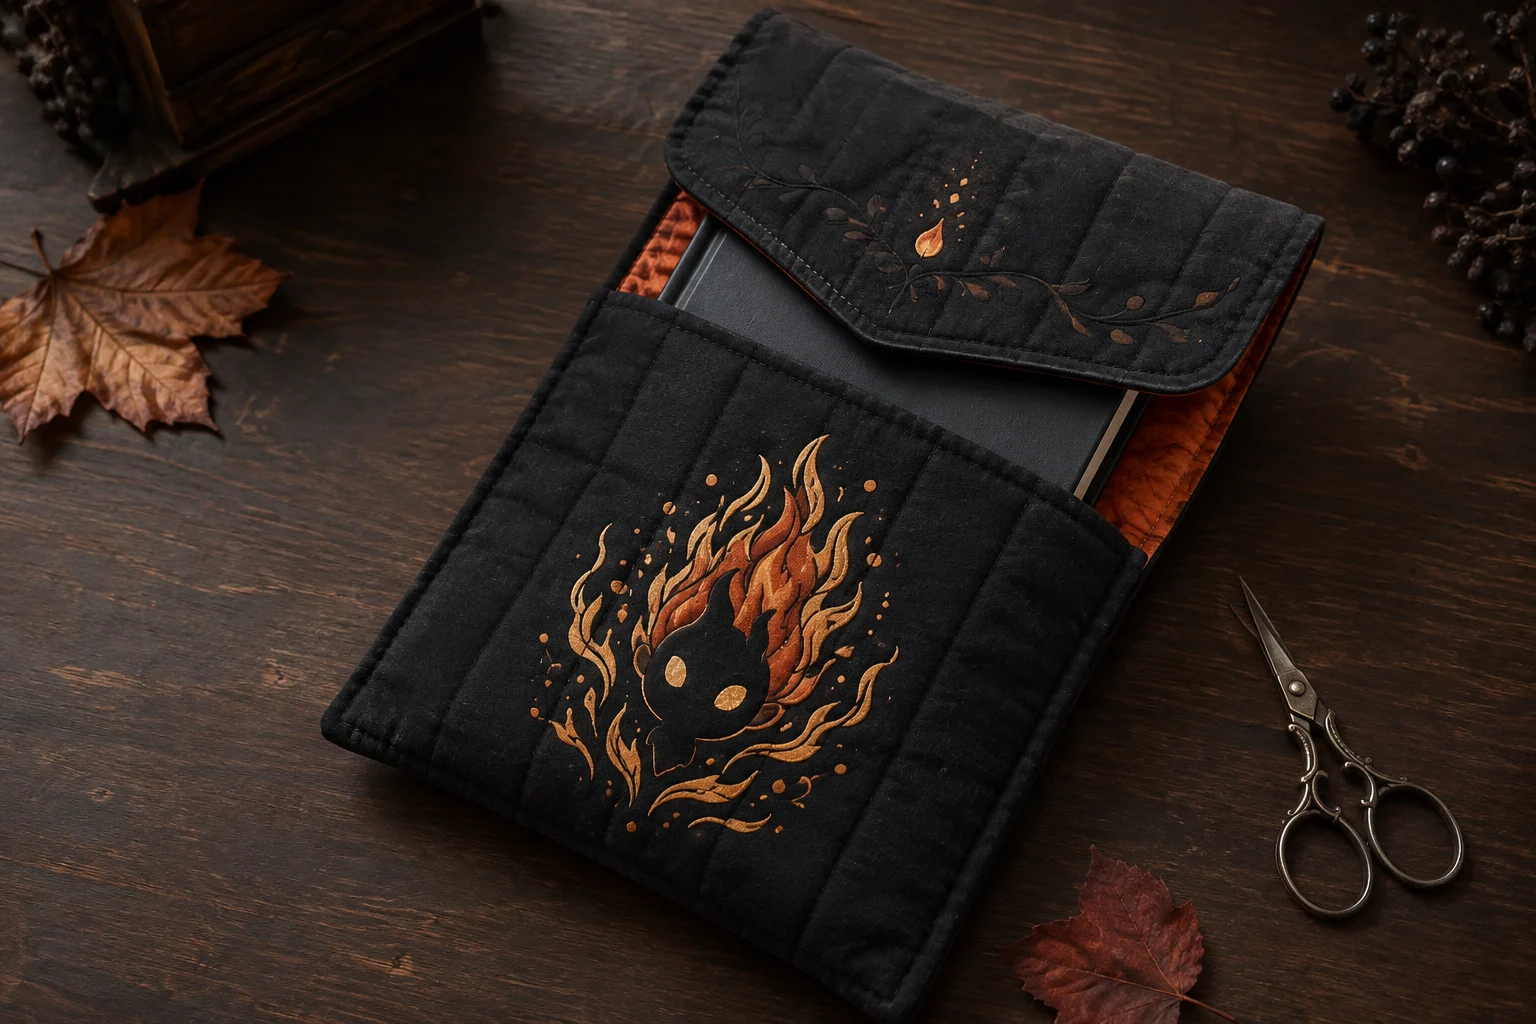
This padded sleeve turns a favorite hardcover, paperback, or journal into a protected piece of magical autumn décor. A dark canvas exterior carries one simplified fire-spirit motif in metallic gold and orange HTV; warm lining, low-loft fleece, and a soft flap help guard the book from everyday scuffs inside a tote. The decoration is pressed while the exterior is still flat, so the finished seams stay away from the heat zone.
This is an original project plan based on standard lined-pouch construction and manufacturer-described iron-on application. Book dimensions, fabric weave, prewash shrinkage, batting loft, interfacing, needle, thread, seam width, HTV adhesive, heat tool, and pressing surface all change the result. Make the full paper prototype and a complete fabric-and-HTV scrap test, then follow the current directions from the fabric, stabilizer, sewing-machine, cutting-machine, heat-tool, and vinyl makers. The featured KleanKutChaos files provide decorative artwork; they do not include the sleeve pattern or sewing plan described here. This exact material combination has not been represented as physically tested.
What you’ll need
- Howl's Moving Castle SVG Bundle from the featured KleanKutChaos listing
- The exact book, journal, or e-reader the sleeve will hold
- Plain paper, ruler, pencil, removable tape, and paper scissors for a full-size fit prototype
- Prewashed cotton canvas, denim, or other stable woven exterior fabric
- Prewashed quilting cotton or another smooth woven lining fabric
- Low-loft one-sided fusible fleece, such as Pellon 987F, confirmed compatible with the exterior fabric
- Optional midweight fusible interfacing for a crisper flap, used only as its maker directs
- Smooth, metallic, or foil heat-transfer vinyl compatible with the chosen exterior fabric
- Cricut-, Silhouette-, or similar cutting machine with the blade and mat recommended for the HTV
- Heat press or household iron approved by the HTV maker, plus a stable heat-safe pressing surface
- Sewing machine, its current manual, coordinating polyester thread, and a fresh needle suited to the fabric stack
- Rotary cutter or fabric scissors, self-healing mat, acrylic ruler, seam gauge, fabric marker, and sewing clips
- Point turner, seam ripper, pressing cloth or protective sheet only if the material makers permit it
- One sew-in snap or a short piece of hook-and-loop tape for the closure; avoid a loose magnetic closure around children or pets
- Scraps of every fabric, stabilizer, and HTV layer for cut, fuse, stitch, peel, rub, and flex tests
How to make it
- 1
Measure the real book
Close the target book and measure its height, cover width, and spine thickness at the fullest points. Add the cover width and half the spine thickness to estimate each sleeve face, then add ease for the batting and seams. Record the numbers on paper; nominal trim size is not enough because covers, jackets, and binding thickness vary.
- 2
Build a taped paper sleeve
Fold paper around the book to make a front, back, bottom, and flap, then tape the side seams outside the fit area. Start with about three-eighths inch of ease around the book and a flap that overlaps the front by 2 to 2½ inches. Slide the book in and out several times. Enlarge the paper pattern until the book moves without scraping while the empty sleeve still holds its shape.
- 3
Draft the seam-aware pattern
Open the successful paper sleeve and transfer it to fresh paper. Add a consistent half-inch seam allowance around the body and flap unless your sewing-machine method requires another width. Mark the finished fold line, top edge, flap center, closure position, exterior design zone, and a half-inch no-HTV buffer beside every seam. Cut separate exterior, lining, fleece, and optional flap-interfacing templates.
- 4
Simplify the fire-spirit artwork
Import one flame-centered design from the bundle, lock its proportions, and size it inside the marked decoration zone. Preserve broad flames and the central silhouette while removing isolated specks, hairline slivers, and tiny openings that are unlikely to weed cleanly. Keep separate color layers simple and slightly spaced rather than stacking many narrow metallic pieces.
- 5
Test-cut a miniature detail sample
Mirror the motif because HTV is normally cut from the reverse side, and place the material on the mat in the orientation its maker specifies. Cut a one-inch sample containing an inside curve, narrow flame tip, and small opening. Weed it on the carrier. If edges pull or tiny parts distort, simplify or enlarge the artwork and use the maker's named material setting before cutting the full design.
- 6
Cut the fabric and stabilizers
Press the prewashed fabric only as its maker permits, align the pattern with the fabric grain, and cut two exterior and two lining body pieces plus the planned flap pieces. Cut fleece and optional interfacing using their required seam treatment; some products should stay out of seam allowances. Transfer only essential marks to the wrong side with a removable fabric marker.
- 7
Fuse the fleece without distortion
Apply the fleece fusible side to the wrong side of the exterior pieces exactly as its manufacturer specifies, using the required heat, moisture, press time, lift-and-place motion, and cooling period. Support the full piece and avoid dragging the iron. Fuse optional flap interfacing separately, then trim only stray stabilizer that extends into a prohibited seam area.
- 8
Test the complete heat stack
Build a scrap stack with the exact exterior, fleece, pressing surface, protective layer, HTV, and heat tool. Preheat the fabric blank if the vinyl maker directs, then press with its current temperature, time, pressure, and peel method. Let the sample settle, stitch beside it, flex it, rub the edges, and inspect for shine, scorching, quilting compression, adhesive bleed, puckering, or lift. Change only according to the material makers' guidance.
- 9
Press the full motif before sewing
Lay one stabilized exterior face perfectly flat and place the mirrored, weeded motif inside the pattern's protected zone. Keep the carrier clear of every seam and fold. Press each color with the tested sequence without sliding the heat tool, observe the specified hot, warm, or cool peel, and allow the piece to cool flat. Do not pin through the finished vinyl.
- 10
Sew and shape the exterior shell
Place exterior pieces right sides together, clip the sides and bottom, and stitch at the drafted seam allowance with the needle, stitch length, and speed suited to the stack. Backstitch only where appropriate. Trim bulky fleece from corners without cutting stitches, grade the seam allowances if needed, and press the seam from the wrong side using a safe method that does not reheat the HTV directly.
- 11
Assemble the flap and closure
Sew the flap pieces right sides together around the outer edges, leaving its attachment edge open. Trim, turn, shape gently, and topstitch if the test stack handles it cleanly. Baste the flap to the back exterior with raw edges aligned. Position a sew-in snap or hook-and-loop tape using the paper map; stitch it securely without sewing through the book cavity or piercing the vinyl.
- 12
Sew the lining with a turning gap
Place the lining pieces right sides together and stitch the sides and bottom, leaving a 3½- to 4-inch gap in one straight side or bottom seam. Press and trim the corners as the fabric allows. Keep the opening large enough for the padded exterior to pass through without pulling the lining off grain.
- 13
Join, turn, and close the sleeve
Turn the exterior right side out, leave the lining wrong side out, and place the exterior inside the lining so right sides face. Match side seams and clip the top circumference with the flap tucked safely between layers. Stitch the top edge, then pull the project slowly through the lining gap. Close the gap by machine or ladder stitch and push the lining smoothly into the sleeve.
- 14
Topstitch and perform the final fit test
Roll the top seam between your fingers so lining does not creep to the outside, then topstitch only if the tested machine setup feeds the padded layers evenly. Insert the actual book, close the flap, and check that the cover is not compressed, the closure does not press into it, and no HTV edge enters a fold. Store the sleeve flat and clean it only by methods approved for every fabric, stabilizer, and vinyl layer.
Practical finishing tips
- Decorate the exterior before assembling the sleeve; a flat panel is easier to center, support, and press safely.
- Write TOP, FRONT, BACK, and GRAIN on the paper pattern so the motif and flap cannot be rotated during cutting.
- Keep HTV at least half an inch from stitching and heavy folds; metallic finishes show needle holes and repeated creasing.
- Use sewing clips beside the decorated area rather than pins through the vinyl or coated fabric.
- If the book has a removable dust jacket, prototype with it on and off before choosing the final amount of ease.
- Press seam allowances from the reverse side only when every material maker permits the heat stack; a wooden seam roller is a lower-heat alternative.
Troubleshooting
The prototype did not include enough batting, seam, or jacket allowance, or the fabric shrank after measuring. Do not force the book inside. Reduce fleece bulk only if its maker allows, use the sleeve for a smaller book, and redraft with extra ease around the complete tested stack.
The lining may be larger than the sewn exterior or the top seams may be misaligned. Compare the sewn circumferences, take in only the excess symmetrically, press the lining seams, and anchor the bottom seam allowances together with a short thread chain if that construction method suits the pattern.
Stop flexing the area and check the vinyl maker's re-press guidance. Protect the surface, apply only the approved heat and pressure, and let it peel and cool as directed. If the scrap test also fails, use a confirmed fabric/HTV combination instead of repeatedly overheating the sleeve.
Too much fleece or ungraded seam allowance is trapped at the turn. Work from the inside, trim only within a safe distance of the stitches, grade the layers, and reshape with a blunt point turner. Never cut into the seam to chase a sharp corner.
Its center mark or side seams were not matched before the top seam was sewn. Unpick only the affected top section, realign the flap perpendicular to the back panel, baste it securely, and resew with even feeding.
The hardware was positioned before the padded sleeve was filled. Put the actual book inside, fold the flap without stretching it, mark the true meeting point, and move a sew-in closure. Patch abandoned needle holes from the wrong side if needed; do not relocate a magnetic snap into unsupported fabric.
Ways to make it yours
Redraft from the exact device and its case, add only modest ease, use thin fleece, and keep all closures away from buttons, ports, screen edges, styluses, and manufacturer-prohibited magnets.
Shorten the body for a favorite trade paperback and add a flat exterior slip pocket before assembling the shell, keeping the HTV and pocket stitches in separate zones.
Cut one broad flame layer in antique gold and a smaller inset layer in burnt orange, testing the approved layering order and avoiding metallic-on-metallic overlap unless the vinyl maker explicitly allows it.
Replace the snap with two securely stitched fabric ties caught in reinforced side seams, keeping their free ends short enough for storage and away from young children or pets.
Keep crafting
- DIY Cute Bat Magnetic Bookmarks for Halloween Reading — Turn six playful bat cut files into slim magnetic bookmarks with hidden paired magnets, reinforced paper hinges, and book-friendly rounded edges.
- DIY Gothic Witch Book Box With Vinyl & Metallic Paint — Turn a plain book-shaped wooden box into an aged black, plum, and gold keepsake with an ornate witch cameo on the cover.
- DIY Carnivorous Plant Pop-Up Halloween Card With Cricut or Silhouette — Build a dimensional carnivorous-plant card that opens into a tiny haunted flower shop, then folds flat for an envelope with measured tabs, clean score lines, and sturdy paper layers.
Inspiration & further reading
This is an original Klean Kut Halloween Crafts project inspired by approachable techniques shared across trusted craft and home sources. Explore Cricut Heat Guide, Cricut Everyday Iron-On instructions, Cricut blank preparation for heat transfer, Pellon 987F Fusible Fleece specifications and Singer sewing-machine manual library for more ideas and technique background.