
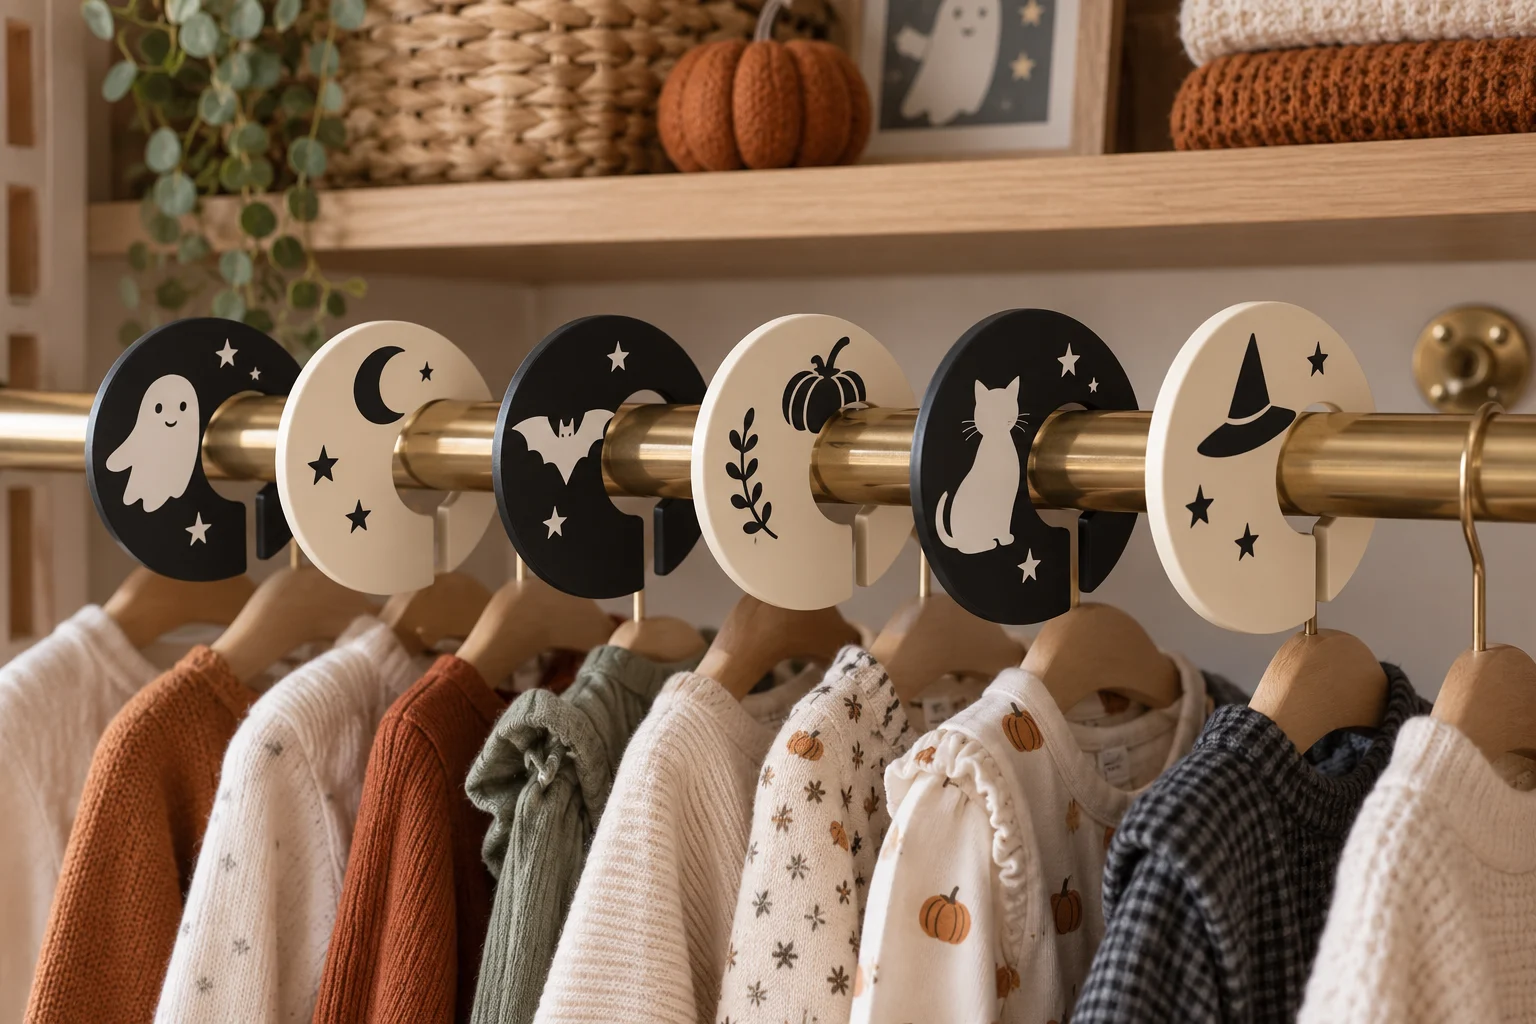
A row of decorated size dividers makes it much easier to see what fits now, what comes next, and which tiny outfits should move into storage. This project uses factory-made C-shaped closet dividers, one-color vinyl motifs, and small size labels on the backs. The decoration stays bold enough to cut cleanly at a compact scale, while the finished pieces remain easy to remove whenever the wardrobe changes.
This is an original project plan based on common adhesive-vinyl application and closet-organization methods. Divider material, surface finish, rod diameter, opening width, vinyl adhesive, artwork detail, blade condition, mat grip, transfer-tape tack, room temperature, humidity, and handling all affect the result. Make paper proofs and test the exact vinyl on one divider before decorating the full set. Follow the current directions from the divider, closet-system, cleaner, vinyl, transfer-tape, cutting-machine, blade, and mat manufacturers. The featured KleanKutChaos bundle supplies the decorative baby silhouettes; work from duplicates and simplify the selected art for small vinyl cutting. The featured KleanKutChaos file is the design source for this tutorial, and this tutorial does not claim that the pictured combination was physically tested with the listing files.
What you’ll need
- Halloween Baby Silhouette Bundle from the featured KleanKutChaos listing
- Six or more factory-made C-shaped closet dividers sized for the exact closet rod
- Permanent or removable adhesive craft vinyl approved for the divider surface
- Transfer tape matched to the chosen vinyl
- Cricut-, Silhouette-, or similar cutting machine with a clean fine-point blade
- Compatible clean standard-grip cutting mat
- Cutting-machine software and a duplicate working copy of each selected design
- Copy paper, printer or pencil, scissors, ruler, and flexible measuring tape
- Low-tack painter's tape, scraper, brayer, weeding tool, fine tweezers, and bright task light
- Divider-maker-approved cleaner and two lint-free cloths
- Fine-tip permanent marker or simple vinyl lettering for size labels on the backs
- A stable work surface and soft towel to protect the divider faces
- Small resealable envelope for one spare decal of each motif
- Lidded container for vinyl scraps and tiny weeded pieces
- Eye protection
How to make it
- 1
Confirm the dividers fit safely
Measure the closet rod diameter and compare it with the divider maker's stated opening and compatibility. Test one undecorated divider at the least crowded end of the rod. It should install and release by the maker's intended method without forcing, bending, scraping the rod, catching hangers, or loosening closet hardware. Do not cut, drill, heat, or widen a divider to make it fit.
- 2
Plan the size sequence
Choose a sequence that matches the clothes actually being stored, such as newborn, 0–3 months, 3–6 months, 6–9 months, 9–12 months, and 12–18 months. Write the range for each divider on a paper map and decide which direction the decorated fronts should face when viewed from the room.
- 3
Measure the usable decoration area
Measure the flat face of one divider while avoiding the rod opening, lower slot, molded rim, texture, and any area touched during installation. Subtract at least a quarter inch from every edge. Record one maximum square for the motif and a separate small rectangle on the back for the size label.
- 4
Simplify six working copies
Duplicate six friendly silhouettes from the bundle and preserve the original files. Keep each main outline and only the largest facial or costume details. Remove isolated specks, hairline curves, tiny stars, narrow gaps, and fragile interior pieces. Thicken weak bridges so the smallest feature remains practical at the measured final size.
- 5
Make paper placement proofs
Print or sketch every motif at final size, cut around the paper shapes, and tape them temporarily to the divider fronts. Hang the proof set on the rod and view it from the doorway. Confirm that each image reads clearly, the sequence feels balanced, and fingers can still reach the opening without rubbing the artwork.
- 6
Prepare and label the backs
Remove the proofs and write each size range neatly on the back with a surface-compatible permanent marker, or cut plain lettering large enough to weed easily. Keep labels away from the opening and grip zone. Let marker ink cure for the maker's stated time before stacking or turning the dividers face down.
- 7
Clean one test divider
Wash hands, place the divider on a soft towel, and clean only as its maker recommends. Do not use household oils, polish, abrasive pads, acetone, or an unapproved solvent. Let the piece dry completely, then handle it by the edges so skin oils do not return to the decoration area.
- 8
Run a surface-adhesion test
Apply a small square of the exact vinyl to a hidden rear area with the intended transfer tape. Leave it for the vinyl maker's recommended settling period, then inspect adhesion and remove the test only as both makers allow. Stop if the finish clouds, stains, lifts, scratches, or remains too textured for a dependable bond.
- 9
Test-cut the smallest details
Place a scrap of vinyl on the mat and start with the material maker's recommended cut setting. Include the narrowest eye, hat brim, bat wing, and pumpkin groove retained in the simplified files. Weed the sample and transfer it to a scrap surface. Adjust one setting or enlarge the artwork at a time until every detail releases cleanly.
- 10
Cut and weed the decal set
Arrange all six motifs with enough space for individual transfer-tape rectangles, then cut with the tested setting. Remove the surrounding vinyl first and weed interior pieces under bright light. Compare each finished decal with its paper proof and recut any torn, stretched, or incomplete motif instead of patching small areas.
- 11
Apply the first motif
Cover the weeded decal with matched transfer tape and burnish gently. Align it over the clean test divider using the paper-proof measurements, then make a painter's-tape hinge through the center. Apply one half at a time from the hinge outward, keeping the vinyl relaxed. Peel the transfer tape back slowly at an acute angle.
- 12
Complete the coordinated set
Repeat the same alignment and hinge method for the remaining dividers. Alternate black and cream blanks or reverse the vinyl color only if the contrast remains strong. Keep every motif at the same visual scale, even when their measured widths differ, and avoid wrapping vinyl over rims or around the rod opening.
- 13
Let the vinyl settle
Place the finished dividers flat, separated, and face up for the vinyl maker's recommended settling time. Keep them dry and indoors. Do not use a heat gun, iron, hair dryer, liquid sealer, dishwasher, or aggressive pressure to speed adhesion. Inspect all edges under side light before putting the set into service.
- 14
Install, organize, and inspect
Install each divider by the maker's intended method with the closet rod supported normally. Arrange clothes by the written size ranges, keeping the rod within its rated load and hangers free to move. Check that no divider catches fabric or scratches the rod. Reinspect the pieces during wardrobe changes and remove any cracked, warped, sharp, or peeling divider immediately.
Practical finishing tips
- Use one bold motif per divider; compact decals are easier to cut, read, and maintain than miniature scenes.
- Keep the size information on the backs so the fronts form a decorative collection while labels remain easy to update.
- Choose a matte vinyl finish to reduce glare from closet lighting and make small silhouettes easier to see.
- Make a spare of each decal during the same cutting session and store it flat in a labeled envelope for future replacement.
- Photograph the final size order before a seasonal wardrobe swap so the set is quick to reinstall.
- If several sizes share one section, use a removable blank tag on the hanger rather than crowding the decorative divider with extra text.
Troubleshooting
Stop decorating the set and review the cleaning method, surface texture, adhesive compatibility, temperature range, and settling time. Remove the failing decal only as the makers direct, then test a different approved vinyl or use removable cardstock labels on hangers instead.
Enlarge the motif, delete the smallest openings, thicken narrow bridges, check the blade and mat, and repeat the detail test. A simpler face or solid silhouette will look cleaner than a patched miniature design.
Lay the divider on a supported towel, burnish the vinyl from the back of the tape, and peel the tape slowly at a very low angle. If the tape remains too aggressive, stop and test a lower-tack product matched to the vinyl.
Use the paper proof to mark a small centerline on painter's tape, not on the divider face. Reapply only if the vinyl maker permits repositioning; otherwise remove the decal as directed and use the prepared spare.
Remove it immediately and confirm the product is oriented correctly and compatible with the rod. Do not sand, cut, heat, or reshape it. Replace it with a smoother factory-made divider or switch to hanging size tags.
Remove the divider from use, clean the back only with an approved method, and relabel with a marker rated for the exact surface. Allow the full cure time before handling, or use simple compatible vinyl lettering instead.
Ways to make it yours
Use warm-cream dividers with matte-black silhouettes and repeat only moons, bats, and tiny witch hats for a quiet gothic look.
Keep the motifs identical but assign one muted vinyl color to each growth stage, using only colors with reliable contrast on the divider blanks.
Choose removable vinyl that passes the surface test, then keep plain size labels on the backs so the Halloween fronts can come off after the season.
Print the motifs on heavy cardstock, laminate them according to the pouch maker's directions, and attach them to individual hangers with closed rings that remain outside the clothing and crib areas.
Keep crafting
- DIY Spooky Baby Onesies & Matching Treat Bags — Create a little collection of soft Halloween bodysuits and matching keepsake treat bags using playful baby silhouettes.
- DIY Cute Bat Magnetic Bookmarks for Halloween Reading — Turn six playful bat cut files into slim magnetic bookmarks with hidden paired magnets, reinforced paper hinges, and book-friendly rounded edges.
- DIY Whimsical Pumpkin Dry-Erase Harvest Menu Board — Turn a thrifted glass frame into a reusable fall menu board with a whimsical pumpkin border protected behind the glass and a smooth write-on surface in front.
Inspiration & further reading
This is an original Klean Kut Halloween Crafts project inspired by approachable techniques shared across trusted craft and home sources. Explore Cricut vinyl cutting and application guide and Cricut transfer tape instructions for more ideas and technique background.