
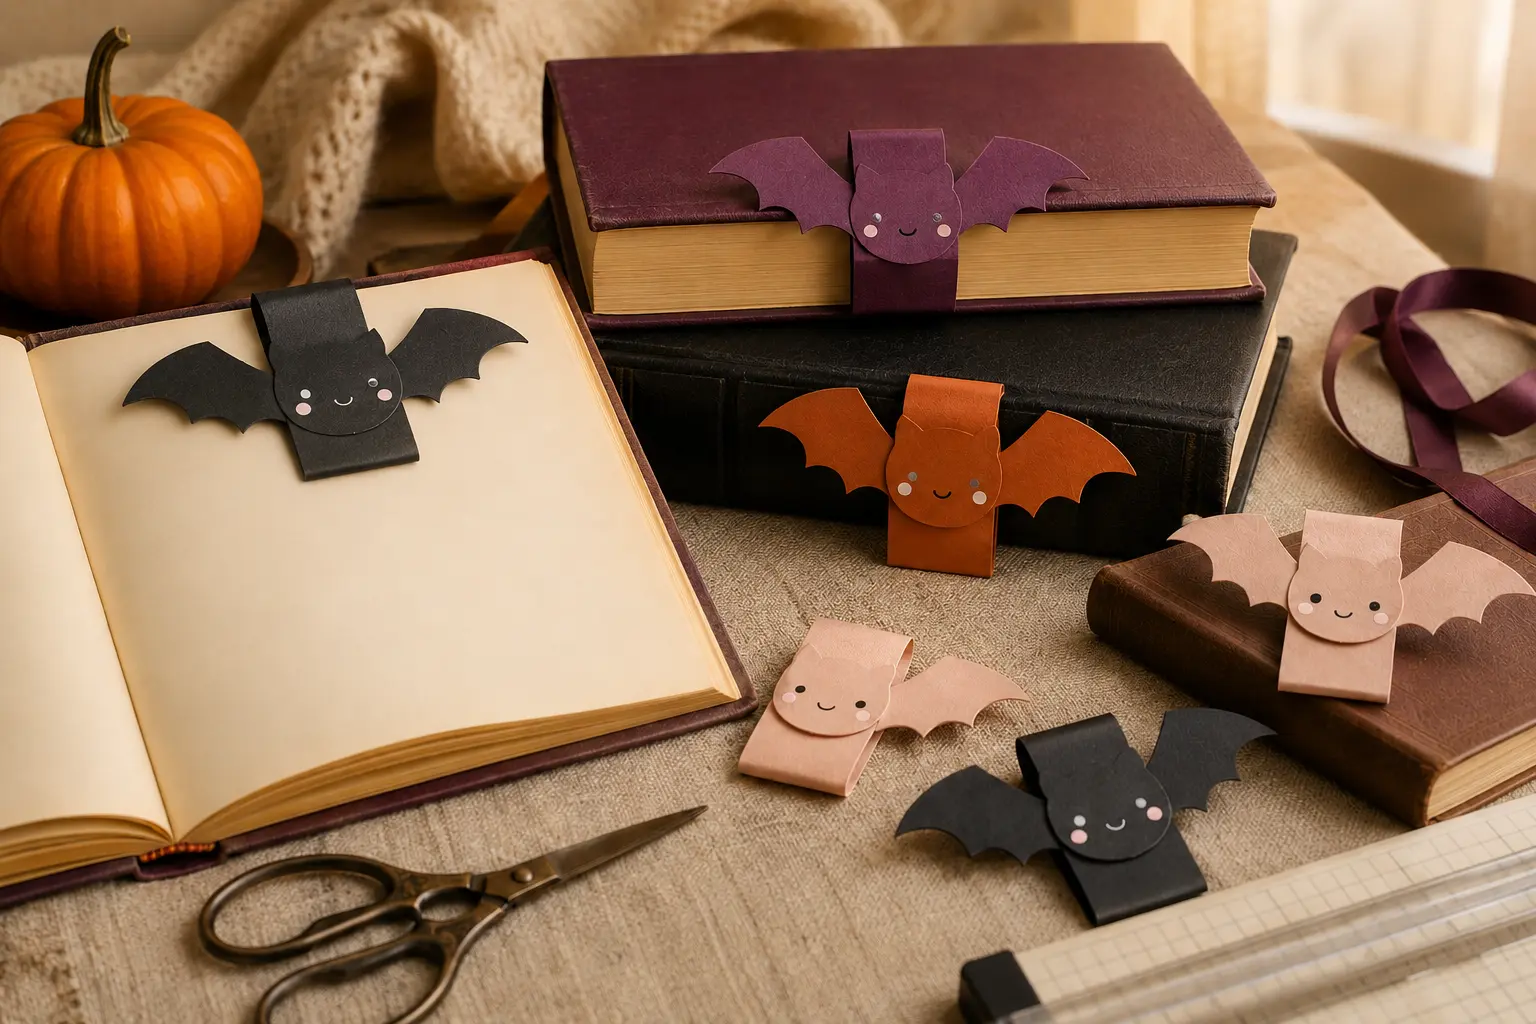
A magnetic page clip is a satisfying way to turn a small cut file into something useful. In this set, each bat becomes the decorative front of a folded cardstock bookmark while a plain rear flap hides the second magnet. The two sides close around a page, so no adhesive touches the book and the little ears remain visible above the page edge.
This is an original project plan based on standard cardstock cutting and common paired-magnet bookmark construction. Cardstock grain, blade condition, mat tack, adhesive, magnet size and strength, page thickness, and cutting-machine settings vary. Treat the dimensions as planning guidance, test a paper prototype and one finished sample with your exact materials, and follow the current instructions from the cardstock, adhesive, magnet, and machine makers. This material combination has not been represented as physically tested.
What you’ll need
- 24 Cute Halloween Bats SVG bundle from the featured KleanKutChaos listing
- Smooth 65–80 lb cardstock in black, plum, blush, cream, or burnt orange
- Lighter cardstock for the folded hinge and hidden inner liners
- Six matched pairs of small, smooth craft magnets intended for enclosed paper projects; avoid loose magnetic balls or cubes
- Acid-free paper adhesive plus the magnet maker’s recommended compatible adhesive
- Cricut-, Silhouette-, or similar cutting machine with a fine-point blade
- LightGrip or StandardGrip cutting mat selected for the actual cardstock weight and condition
- Scoring tool or bone folder, ruler, pencil, and paper trimmer
- Plain copy paper for a full-size prototype and polarity map
- Low-tack painter’s tape and a marker for temporarily identifying magnet faces
- Wax paper, clean acrylic blocks or books, and edge clips for flat curing
- Plastic or wooden pickup stick for positioning magnets without sharp metal tools
- Scrap paper or an inexpensive notebook for the final hold test
How to make it
- 1
Choose a page-friendly scale
Select six bats with bold outer silhouettes and limited fragile detail. Aim for a finished bat about 2 to 2.75 inches wide, then plan a rear flap that sits completely behind the body. Keep ears, wings, and points away from the page fold so they decorate the top edge without digging into paper.
- 2
Build the bookmark pieces
In the cutting software, keep one decorative bat for the front and make a simplified matching back layer to reinforce it. Add a plain rear flap and a narrow hinge strip long enough to fold over the page edge. Round the flap corners and keep the hinge at least three-quarter inch deep so the fold carries the opening force instead of the bat’s ears.
- 3
Make a paper prototype first
Cut the complete shape from copy paper, fold the hinge, and clip it over a scrap page without magnets. Close the book gently and check that the bat remains visible, the flap does not extend beyond the artwork, and no point creases the page. Resize now rather than after cutting the final cardstock.
- 4
Prepare the cardstock and mat
Place a clean sheet on the grip level recommended for that cardstock—Cricut generally pairs lighter cardstock with LightGrip and medium cardstock with StandardGrip. Brayer only as the mat maker directs. Use a fresh enough fine-point blade and keep decorative layers separated by color to reduce waste.
- 5
Run one small test cut
Use the machine maker’s closest material setting, then cut a small bat or a one-inch detail from the actual cardstock. Confirm that it releases without fuzzy edges, torn ears, or deep scoring into the mat. Adjust only one setting at a time and repeat the test before cutting the full set.
- 6
Cut and sort the layers
Cut the decorative fronts, reinforcement backs, hinge strips, rear flaps, and small liner patches. Lift the mat away from the cardstock rather than curling the paper upward. Sort each bookmark into its own stack and do not use vinyl transfer tape on ordinary cardstock.
- 7
Pair and map every magnet
Let each magnet pair snap together away from electronics, then separate one pair at a time. Mark the two outer faces temporarily with matching symbols on painter’s tape. Lay them on a paper diagram showing front flap and rear flap. Confirm attraction through two scrap-cardstock layers before any adhesive is opened.
- 8
Assemble the reinforced bat front
Glue each decorative bat to its matching back layer with a thin, even coat of paper adhesive. Align from the center toward the wings and wipe away squeeze-out immediately. Press the laminated bat flat between wax paper according to the adhesive maker’s directions, keeping the hinge area free of glue until the layer is stable.
- 9
Fold and attach the hinge
Score the hinge strip lightly at both folds without cutting through it, then burnish the folds with a bone folder. Attach one end behind the reinforced bat and the other to the plain rear flap. Dry-fit the bookmark on scrap paper and confirm that both magnet pockets will face one another when closed.
- 10
Enclose the first magnet
Working with one bookmark at a time, adhere the first magnet inside the bat-side pocket using only the adhesive and cure method approved for that magnet and cardstock. Cover it completely with a cardstock liner patch whose glued border extends beyond the magnet on every side. The magnet must not remain exposed or be able to slide out.
- 11
Align and enclose the second magnet
After the first side is stable, let the paired magnet find its correct attracting position through the closed bookmark. Mark that location, reopen the flap without flipping the magnet, and secure it inside the rear pocket. Cover it with a second fully glued liner, then close the bookmark briefly to verify attraction rather than repulsion.
- 12
Cure, inspect, and test on scrap pages
Cure the bookmark for the full time specified by the adhesives, pressed between wax paper with weight on the flat cardstock and clips only at nonmagnetic edges. Check that every liner is sealed, every magnet is immobile, and no dried glue or sharp corner touches a page. Test on scrap paper first, then close a book gently and reduce the magnet strength or layer bulk if the page puckers.
Practical finishing tips
- Use the boldest bat silhouettes for the first batch; tiny eye or mouth details can be added as a contrasting paper layer after the structural pieces fit.
- Build and finish one bookmark before batch-cutting all six so you can correct hinge length, magnet placement, and cardstock thickness without wasting materials.
- Keep every magnet centered well inside a glued liner patch; locating it near an ear or wing puts opening stress on a narrow paper point.
- Store the finished bookmarks closed in matched pairs so the hinges stay flat and loose objects cannot stick to the magnets.
- For valuable, fragile, or archival books, use an acid-free nonmagnetic corner bookmark instead of placing any magnetic craft accessory on the pages.
Troubleshooting
The second magnet flipped between the layout check and gluing. Remove it only before the adhesive cures, return to the polarity map, and test attraction through the exact cardstock layers. If it is already sealed, remake that flap rather than cutting open a finished pocket around a loose magnet.
First remove glossy coatings or excess layer bulk between the magnets. If the selected magnets are too weak for the construction, remake the sample with thinner liners or a maker-approved matched pair; do not stack loose magnets or jump to hazardous high-powered magnetic balls.
The bookmark is too thick, too wide, or clamps too tightly. Use lighter hinge cardstock, a smaller bat, or gentler magnets intended for paper crafts. Test only on scrap paper until the closed book lies flat without pressure marks.
Increase the design size, choose a bolder bat, or simplify isolated hairline details. Repeat the material test with a clean mat and suitable blade setting instead of raising pressure repeatedly, which can embed fibers or damage the mat.
Use less adhesive, spread it evenly, and press the piece flat between wax paper while it cures. Curling can also come from an overly sticky mat, so match the grip to the cardstock and peel the mat away from the paper.
Ways to make it yours
Cut every bat from charcoal and black cardstock, then add one plum or metallic-paper eye detail to distinguish the six silhouettes.
Assign blush bats to romance, orange to cozy mysteries, plum to fantasy, and black to horror so the bookmark doubles as a visual reading key.
Clip one finished bookmark over a bookstore gift card sleeve, then tie the sleeve with ribbon without punching through the bookmark or hiding the magnet-safety note.
For homes, classrooms, or libraries where small magnets are inappropriate, redesign the bat as a folded paper corner pocket and omit magnets entirely.
Keep crafting
- DIY Pink & Orange Kawaii Bat Garland — A happy Halloween garland made with cardstock, twine, and cute bat cut files in colors that feel warm and cheerful.
- DIY Whimsical Pumpkin Dry-Erase Harvest Menu Board — Turn a thrifted glass frame into a reusable fall menu board with a whimsical pumpkin border protected behind the glass and a smooth write-on surface in front.
- DIY Gothic Apothecary Drawer Labels With Removable Vinyl — Turn a plain mini-drawer cabinet into functional gothic storage with nine ornate frame decals, readable center labels, and a reusable placement jig.
Inspiration & further reading
This is an original Klean Kut Halloween Crafts project inspired by approachable techniques shared across trusted craft and home sources. Explore Cricut Cardstock Instructions, Cricut guide to choosing material settings and U.S. Consumer Product Safety Commission magnet safety guidance for more ideas and technique background.