
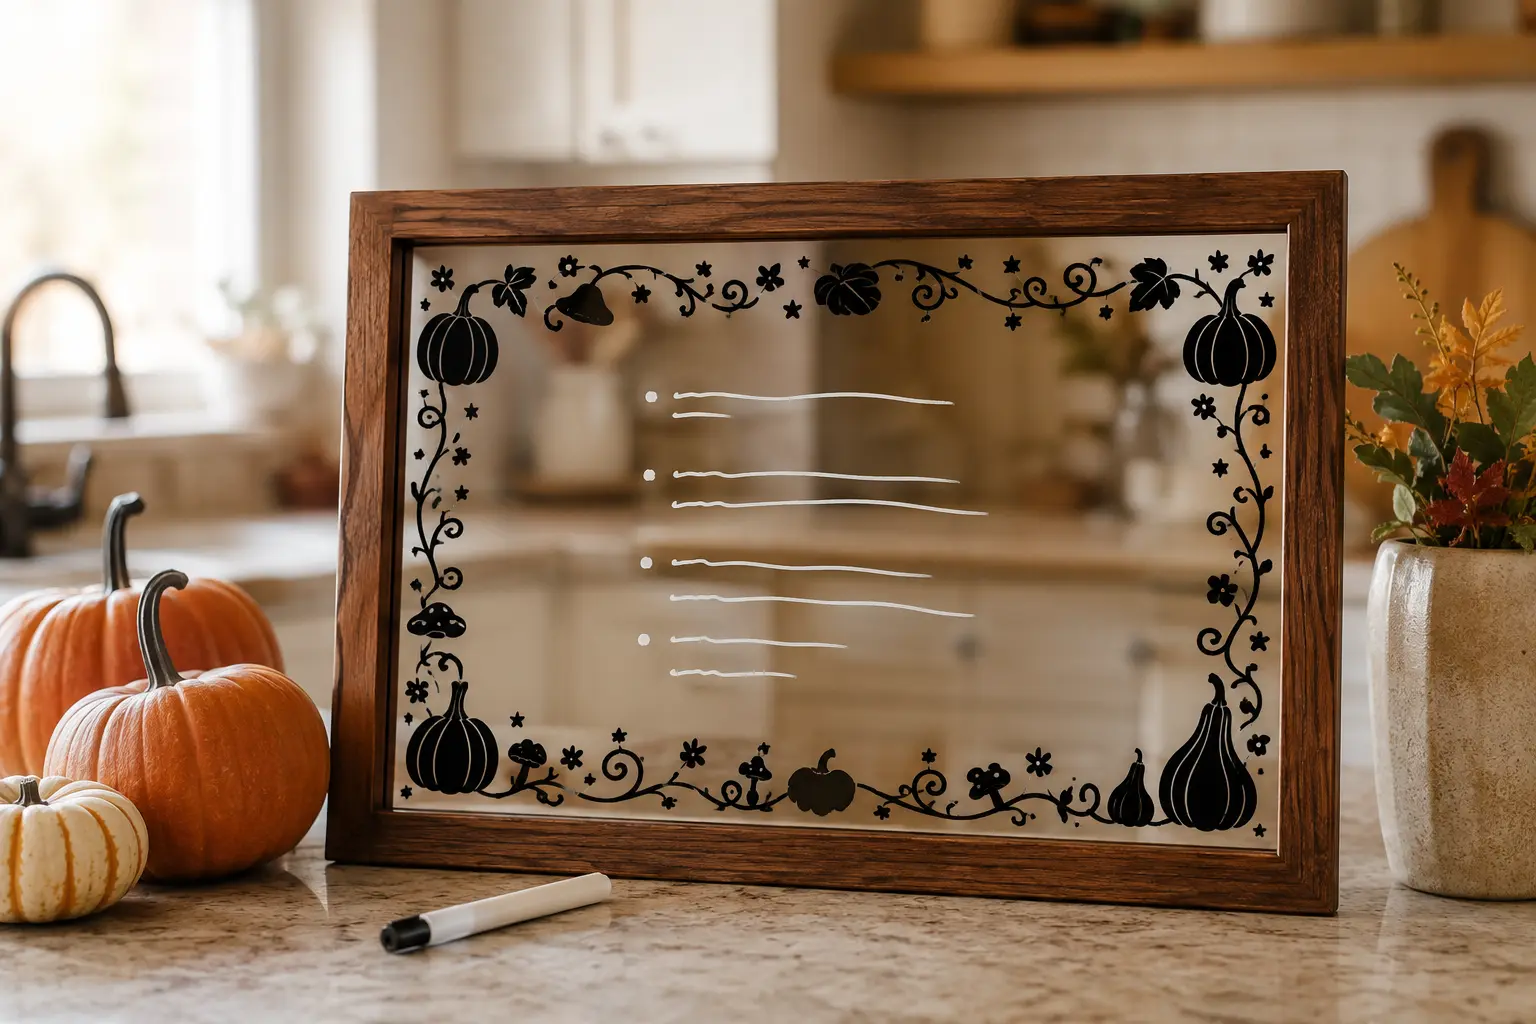
A glass-front frame makes a useful seasonal command center: permanent vinyl can sit safely on the back of the glass while the untouched front becomes a smooth surface for dry-erase notes. The Whimsical Pumpkin bundle works especially well as a loose border because its pumpkins, gourds, mushrooms, flowers, stars, and curling vines can be mixed without making the writing area feel cramped.
This is an original project plan based on standard adhesive-vinyl cutting and transfer methods. Glass coatings, vinyl adhesives, transfer tape, blades, marker formulas, and room conditions vary, so test every material first and follow the current instructions supplied with the exact vinyl and marker you use. The dimensions below are planning guidance, not a claim that this combination has been physically tested.
What you’ll need
- Sturdy thrifted or new frame with intact real glass, ideally 11 by 14 or 12 by 16 inches
- 15-design Whimsical Pumpkin SVG bundle from the featured KleanKutChaos listing
- Smooth permanent adhesive vinyl whose adhesive side shows the intended color through glass
- Standard transfer tape matched to smooth vinyl
- Cricut-, Silhouette-, or similar cutting machine with the blade and mat recommended for the vinyl
- Weeding tool, fine tweezers, scraper, and bright task light
- Plain paper for a full-size border mockup
- Ruler, removable painter’s tape, and a grease pencil or washable glass marker for registration
- Lint-free cloth, mild dish soap, clean water, and optional isopropyl alcohol approved for uncoated glass
- White or pale dry-erase marker tested on the frame glass
- Acid-free cream, kraft, or muted-orange cardstock for the backing
- Optional clear bumper dots or thin frame spacers to keep the backing from rubbing the vinyl
- Cut-resistant gloves for handling loose glass and eye protection if the frame must be repaired
How to make it
- 1
Inspect the frame and glass
Choose a frame that stands securely and has firm tabs or hardware. Remove the backing over a table, then inspect the glass edges, corners, chips, and surface coatings. Replace cracked or chipped glass rather than decorating it. Photograph the original layer order so the frame can be reassembled correctly.
- 2
Define the writing window
Measure only the visible opening inside the frame lip. Reserve a clear central writing area of at least 6 by 9 inches on an 11-by-14 frame, then mark a border lane roughly 1 to 2 inches wide. Keep vinyl at least one-quarter inch inside the visible opening so the frame edge does not hide delicate stems.
- 3
Compose a balanced pumpkin border
Import six to ten designs from the bundle. Place the largest pumpkin cluster in one lower corner, counter it with a medium gourd in the opposite corner, and use mushrooms, stars, flowers, and curling vines to lead the eye around the edges. Leave deliberate gaps; a menu board needs more empty space than decoration.
- 4
Mirror the entire layout
Because the vinyl will be attached to the back of the glass and viewed from the front, mirror the finished border before cutting. This is essential for asymmetrical pumpkins and curling vines even though some silhouettes look nearly the same in reverse. Add two tiny square registration marks outside the visible opening if separate border sections must align.
- 5
Rehearse with full-size paper pieces
Cut or print the mirrored shapes on plain paper and tape them to the back of the glass. Turn the glass over and judge the design from the viewing side. Confirm that the writing area is generous, each pumpkin is fully visible inside the frame lip, and no vine creates a distracting line through the center.
- 6
Clean and dry the glass
Wash both sides with mild dish soap and clean water, rinse thoroughly, and dry with a lint-free cloth. If the glass maker and frame finish allow it, use a small amount of isopropyl alcohol on the vinyl side to remove residue. Do not apply vinyl until the glass is dry, cool, and free of lint, fingerprints, cleaner, and paper fibers.
- 7
Test the vinyl from the viewing side
Make a small test cut from the exact vinyl. Apply it to a hidden edge on the back, then look through the front of the glass. Confirm that the adhesive side has the color and finish you expect, the vinyl bonds without cloudiness, and the transfer tape releases cleanly. Change materials now if the visible adhesive side looks gray, streaked, or uneven.
- 8
Cut and weed in manageable sections
Use the vinyl maker’s recommended machine setting and run a small test cut before the border. Cut the four sides or corner clusters as separate labeled sections instead of one fragile rectangle. Weed from broad negative areas toward thin stems, keeping every section on its liner until the glass and placement guides are ready.
- 9
Transfer the border to the back
Apply the correct transfer tape and burnish the vinyl from both sides. Place the glass viewing-side down on a clean towel. Use painter’s-tape hinges to position one section at a time against the paper-layout measurements, then lower it from the hinge and burnish from the center outward. Peel transfer tape back at a low angle rather than lifting it straight up.
- 10
Reassemble without scraping the vinyl
Remove registration marks and inspect the border through the front. Add a plain cardstock backing that gives the black silhouettes strong contrast. If the backing presses or drags against raised vinyl edges, use thin clear bumpers or frame-safe spacers outside the visible area. Reinstall every tab gently and never force a too-thick layer stack.
- 11
Test, write, and place the board safely
Let the vinyl rest for the period recommended by its maker. Test the dry-erase marker and eraser in a lower front corner, then add the weekly menu or party notes only to the front of the glass. Display the frame on a stable, dry surface away from sink splashes, hot cookware, steam, open flames, and the edge of the counter.
Practical finishing tips
- Photograph the final paper mockup with a ruler in frame; it becomes a fast reference when the design is flipped over for backside application.
- Keep all pumpkin stems and vine tips at least a few millimeters thick at final size so they weed and transfer as one connected shape.
- Use ordinary transfer tape for smooth vinyl unless the vinyl manufacturer says otherwise; overly aggressive tape can make delicate pieces harder to release.
- If the board will hold a long weekly menu, decorate the top and bottom more heavily than the sides to preserve line length.
- Store the marker separately or in a frame-safe adhesive loop on the wood—not on the writing glass—so replacing the holder does not disturb the vinyl.
Troubleshooting
The layout was not mirrored before backside application. Remove the affected section as directed by the vinyl maker, clean the glass, mirror the artwork in the cutting software, and recut it. Do not try to disguise reversed asymmetrical elements with extra decorations.
Burnish the front and back again, then peel the liner away from the vinyl at a low angle while keeping the transfer tape flat. If fine pieces still refuse to move, verify that the transfer tape is compatible and that the cut did not slice through the liner.
Stop before burnishing the whole piece. Lift only the unbonded portion, divide the remaining vine into shorter logical segments if the design allows, and realign each segment to the paper measurements rather than eyeballing the frame edge.
For minor bubbles, press them gently toward the nearest vinyl edge with the scraper wrapped in a soft cloth. Avoid puncturing vinyl on glass. Large creases are usually cleaner to remove and recut than to flatten invisibly.
Check that the marker is labeled for dry-erase use on nonporous glass and follow its cleaning directions. Test a fresh marker and a clean microfiber cloth; never use an abrasive pad or razor that could scratch the writing surface.
Ways to make it yours
Divide the open center with thin straight vinyl lines and use one small pumpkin as the marker for each weekday, leaving the handwritten plans on the front glass.
Use a wider landscape frame and concentrate the pumpkins along the bottom edge so dish names and allergy notes remain easy to read above them.
Replace the paper backing with translucent amber vellum and place the frame near—not on—a cool LED light source for a stained-glass effect without heat or flame.
Keep the vinyl border permanent but cut several cardstock backings in cream, rust, olive, and charcoal so the mood can change without touching the glass design.
Keep crafting
- DIY Pink & Orange Kawaii Bat Garland — A happy Halloween garland made with cardstock, twine, and cute bat cut files in colors that feel warm and cheerful.
- DIY Gothic Rose Window Mirror With Vinyl — Turn a thrifted mirror into a cathedral-inspired rose window with black vinyl, an antique-gold frame, and a clean reflective center.
- DIY Gothic Witch Book Box With Vinyl & Metallic Paint — Turn a plain book-shaped wooden box into an aged black, plum, and gold keepsake with an ornate witch cameo on the cover.
Inspiration & further reading
This is an original Klean Kut Halloween Crafts project inspired by approachable techniques shared across trusted craft and home sources. Explore Cricut Transfer Tape Instructions and Cricut Vinyl preparation and application guide for more ideas and technique background.