
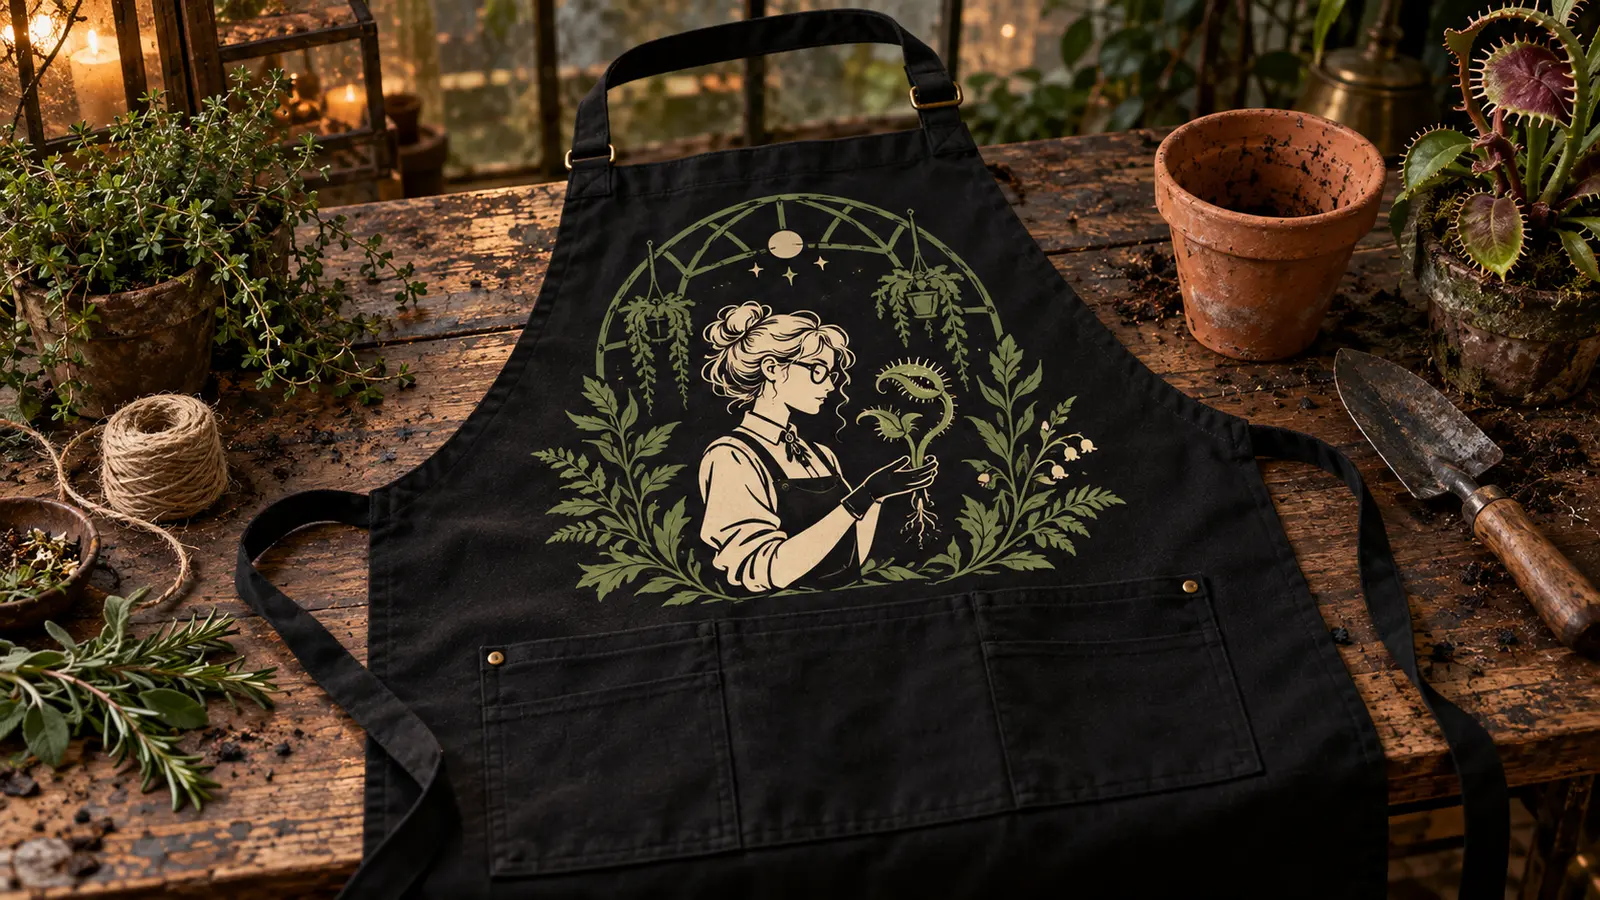
A garden apron earns its keep when it holds seed packets, plant ties, labels, and a clean hand tool without sagging or catching on a bench. This version adds a haunted-greenhouse focal design above the pockets, leaving the working areas free to bend, wash, and carry supplies. The finished piece feels theatrical enough for October potting sessions but remains useful long after the porch pumpkins are gone.
This is an original project plan based on common heat-transfer-vinyl methods for fabric blanks. Apron fiber content, dyes, coatings, seams, pocket construction, HTV chemistry, press model, pressure, design scale, and care routine can all change the result. Test the exact apron and vinyl, follow the current instructions for every material, cutter, blade, mat, and heat tool, and edit only a duplicate working copy of the purchased artwork. The featured KleanKutChaos listing supplies the character artwork; the featured KleanKutChaos file is the design source for this tutorial. This tutorial does not claim that the pictured combination was physically tested with the listing files.
What you’ll need
- Seymour Krelborn SVG from the featured KleanKutChaos listing
- One prewashed cotton or cotton-canvas garden or florist apron with a readable fiber-content and care label
- Heat-transfer vinyl approved for the apron fabric; use one finish or two layerable colors specifically approved by the HTV maker
- Cricut-, Silhouette-, or similar cutting machine with the blade and mat specified for the selected HTV
- Cutting-machine software and a duplicate working copy of the purchased artwork
- Heat press, EasyPress-style tool, or iron permitted by both the apron and HTV makers
- Firm pressing mat or pad sized to fit behind the artwork without crossing pocket seams
- Protective paper or cover sheet only when required by the HTV or heat-tool instructions
- Heat-resistant tape approved for the transfer material
- Cardstock or plain paper for a full-size placement template
- Ruler, flexible tape measure, fabric-safe removable marker or tailor's chalk, and painter's tape
- Lint roller, clean pressing cloth if specified, weeding tool, tweezers, scissors, and bright task lighting
- Scrap fabric with similar fiber content for test cuts and heat tests
- Optional removable pocket liner for loose potting debris; avoid permanently decorating food-contact or pesticide-handling gear
How to make it
- 1
Choose an apron that can take heat
Read the fiber-content, coating, and care labels before designing. Select a smooth, firmly woven cotton or cotton-canvas apron whose maker permits the heat required by the chosen HTV. Reject waxed canvas, unknown coatings, melt-prone synthetics, cracked fabric, and aprons with heat-sensitive waterproof layers unless both manufacturers explicitly approve the combination.
- 2
Prewash and inspect the blank
Wash and dry the apron exactly as its care label directs, without fabric softener if the HTV maker prohibits it. Inspect for shrinkage, dye transfer, warped pockets, loose stitching, and residue. Press out wrinkles only at a fabric-safe setting, then let the apron return to room temperature before measuring.
- 3
Map the working zones
Put the apron on and mark where the bib lies flat when you bend, reach, and kneel. Measure every pocket opening, seam, rivet, buckle, strap, and folded edge. Reserve the pocket mouths, stress points, and side ties as no-press zones so the finished apron stays comfortable and functional.
- 4
Create a full-size paper mock-up
Print or sketch the proposed design at final size, cut around its outer shape, and tape it to the bib. Keep the lowest vinyl comfortably above the pocket seam and the outer edges away from straps and hardware. Wear the apron again to confirm that the artwork does not fold sharply across the chest or disappear under an apron strap.
- 5
Simplify a duplicate artwork file
Keep the purchased file untouched and work from a copy. Isolate the character and seedling as the focal silhouette, remove detached specks, enlarge delicate openings, and thicken narrow bridges that would be fragile at apron scale. Preserve the recognizable composition while reducing details that would be difficult to weed or press evenly.
- 6
Plan the color separation
Assign the main character to the lighter HTV and reserve the moss tone for a few broad botanical accents. Use non-overlapping inset pieces when possible. If the selected HTVs are approved for layering, confirm the permitted layer order and total number of layers; otherwise use side-by-side colors with a narrow fabric gap.
- 7
Test cut and test press
Mirror the sample artwork if required by the HTV, place the material on the mat in the orientation specified by its maker, and cut the smallest enclosed detail plus one narrow stem. Weed the sample and press it onto comparable scrap fabric using the official time, temperature, pressure, and peel instructions. Stretch, cool, and wash-test the sample before committing the apron.
- 8
Cut the design in sections
Mirror the final artwork when required, keep each color on its own carrier, and cut broad sections rather than one oversized sheet if the bib is curved. Label the carriers with their placement order outside the cut area. Weed from large negative spaces toward small details and compare each section with the on-screen preview.
- 9
Prepare a seam-free pressing surface
Slide the approved pressing pad behind the bib so the target area is fully supported and pocket seams hang beyond the pad edge. Move straps, hardware, and ties completely away from the heat plate. If the pad cannot isolate a flat section without crossing a seam or rivet, resize or reposition the design instead of forcing uneven pressure.
- 10
Align with temporary guides
Lint-roll the front, fold the bib gently to find its vertical center, and place removable guide marks outside the design. Position the paper mock-up first, then replace it with the carrier sheet and secure only the outer carrier edge with approved heat-resistant tape. Confirm the design is level while the apron is lying naturally, not stretched.
- 11
Press the first color
Preheat only if the HTV instructions call for it. Apply the first color with the exact time, temperature, pressure, cover sheet, and peel method specified for the vinyl and fabric. Lift the press straight up, keep the carrier still during the required cooling interval, and avoid sliding the heat plate across the apron.
- 12
Add the second color carefully
For approved layered HTV, use the maker's recommended short tack press for the first layer and final press for the last. For side-by-side colors, cover every previously applied area as directed and ensure no bare vinyl touches the heat plate. Stop if the fabric shines, puckers, discolors, or the first layer distorts.
- 13
Cool, inspect, and cure
Lay the apron flat until it reaches room temperature. Check every edge under bright light and perform only the maker-approved finishing press if needed. Remove all guide marks, keep the pockets empty, and wait the full stated cure interval before washing, folding tightly, or using the apron around soil and moisture.
- 14
Load and maintain the apron
Place only lightweight, clean items in the pockets and use a holster or bench rest for sharp or heavy tools. After each session, shake loose debris outdoors, remove the optional pocket liner, and wash inside out according to both the apron and HTV care instructions. Air-dry or machine-dry only as permitted, and never iron directly over the finished vinyl.
Practical finishing tips
- Keep the main design on the upper bib; HTV placed across pocket openings flexes, catches tools, and receives repeated abrasion.
- Use a paper template before cutting so a beautiful design does not end up hidden by straps or distorted by the apron curve.
- Two non-overlapping colors are easier to press and more durable than a stack of several decorative HTV layers.
- A seam-sized gap around rivets and topstitching prevents uneven pressure and gives the transfer a clean visual border.
- Photograph the carrier-sheet placement before pressing the second color so a damaged accent can be recut to the same size.
- Store the apron hanging or loosely rolled after it is fully cured rather than folding through the center of the artwork.
Troubleshooting
Return the carrier to its original position and repress only according to the material's official instructions. Verify the required peel temperature and pressure before trying again; do not add unapproved heat or time to compensate for an incompatible blank.
Reduce cutting pressure only if the carrier was scored, then enlarge the artwork, thicken the weakest stems, or remove tiny details from the duplicate working file. A larger simplified motif will survive apron wear better than delicate linework.
The pressure was uneven. If the maker permits a finishing press, isolate the area on a smaller pad and follow that instruction once. Otherwise remove and recut the affected section after the fabric cools; do not repeatedly overheat the seam.
Stop pressing and let the apron cool. Compare the heat-tool setting with the fabric and HTV guidance, then repeat the test on scrap at the correct conditions. Permanent heat damage cannot be repaired, so move or reduce the design rather than pressing the damaged area again.
Confirm that the cure interval, wash temperature, detergent, and dryer setting matched the HTV instructions. Trim no attached edges while warm. If the maker allows repair pressing, isolate and repress the affected area; otherwise replace the panel or retire the apron from heavy use.
Ways to make it yours
Use only the focal silhouette in a single cream HTV, enlarge it, and omit narrow botanical accents for faster weeding and one press cycle.
Move a compact seedling motif to one side above the pockets, keeping it clear of the tie channel and any area that folds when the apron is knotted.
Apply the artwork to a separately purchased smooth patch material using a compatible method, then attach it with maker-approved removable fasteners outside the pocket zone; remove it before laundering.
Add a separate small canvas zip pouch with one simplified leaf or seedling accent, using the same fabric test and heat settings rather than pressing across the apron pockets.
Keep crafting
- DIY Haunted Houseplant Care Caddy With Cricut Vinyl — Organize your mister, labels, pruning tools, and plant-care basics in a sturdy black caddy decorated with crisp haunted botanical vinyl.
- DIY Carnivorous Plant Felt Hand Puppet With Cricut or Silhouette — Turn a carnivorous-plant cut file into an expressive felt hand puppet with a flexible mouth, layered teeth, leafy details, and a comfortable wrist cuff.
- DIY Haunted Flower Shop Wood Key Holder With Vinyl — Turn a smooth painted board, cream vinyl, and five antique-brass hooks into a useful haunted flower-shop key station for a gothic entryway.
Inspiration & further reading
This is an original Klean Kut Halloween Crafts project inspired by approachable techniques shared across trusted craft and home sources. Explore Cricut Everyday Iron-On instructions, Cricut heat-transfer blank preparation guidance, Silhouette Smooth Heat Transfer material guidance and U.S. Consumer Product Safety Commission Art and Craft Safety Guide for more ideas and technique background.