
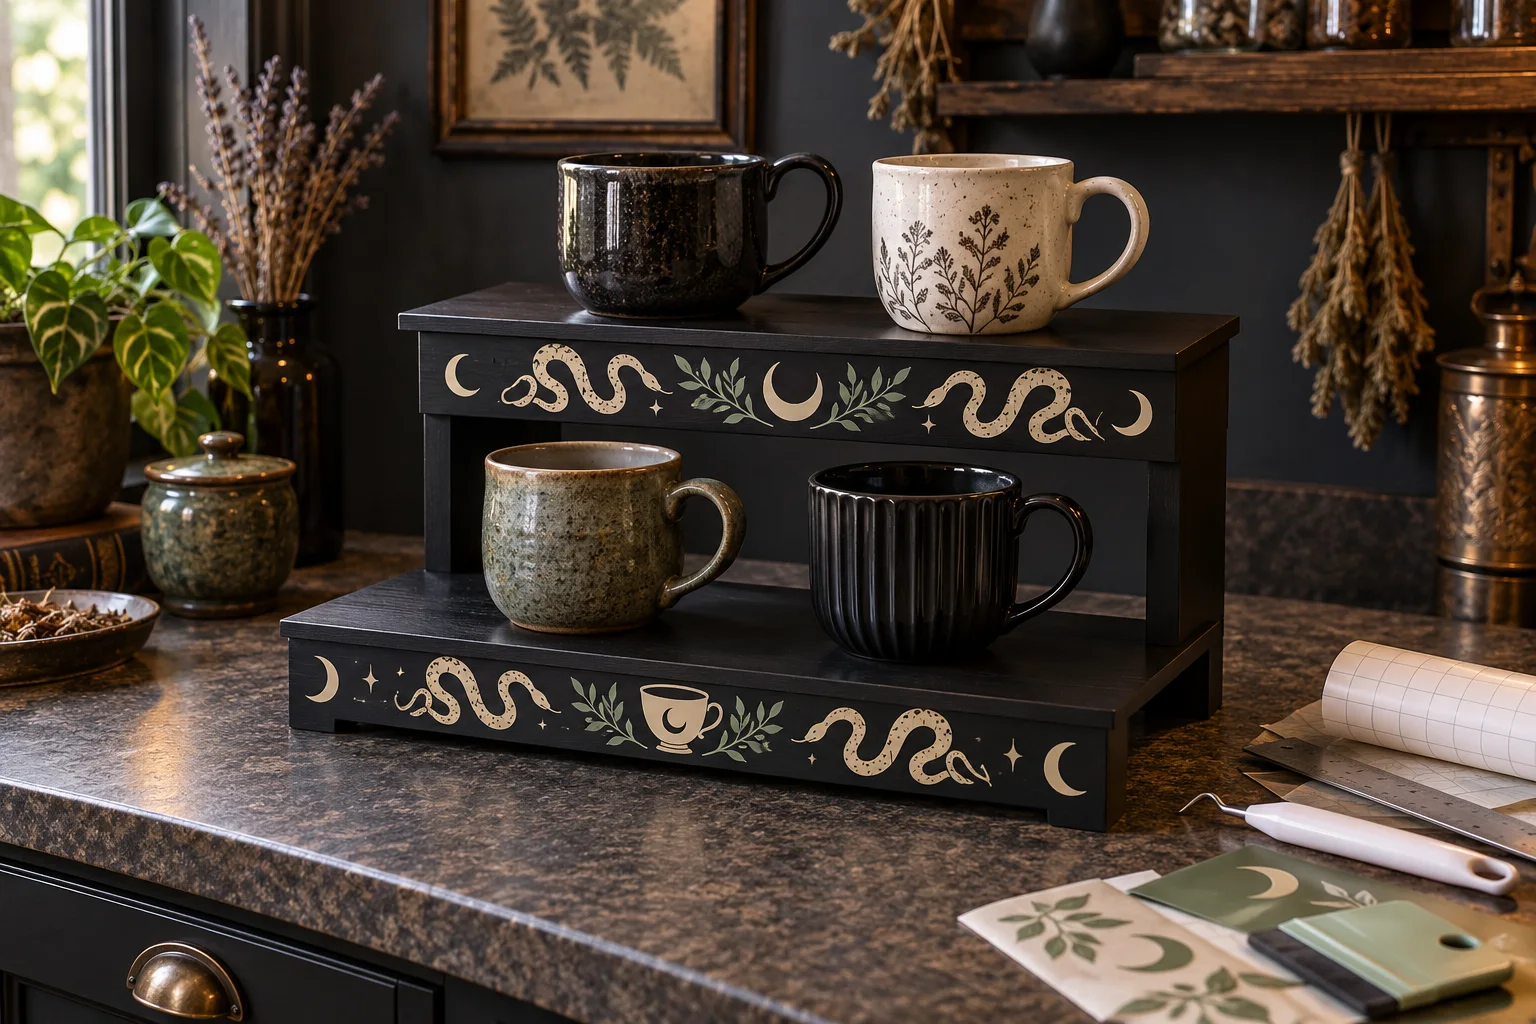
A compact shelf riser can make a small mug collection easier to see without drilling into cabinets or putting vinyl on drinkware. This project begins with a factory-made, freestanding two-tier riser that is already stable and rated for the intended load. Only the cool vertical front aprons become the decorative canvas: a broad snake, a haunted cup, and a few crescent or botanical accents. The horizontal shelves, feet, joints, mug-contact zones, and all food-contact surfaces remain completely undecorated.
This is an original project plan based on ordinary home-cutter and pressure-sensitive-vinyl methods. Riser material, finish, coatings, edge profiles, weight rating, cup dimensions, humidity, cleaner, vinyl formula, transfer tape, blade, mat, and artwork detail can all change the result. Follow the current instructions for the exact riser, cleaner, cutter, vinyl, and transfer tape, and test the real surface in a hidden area. The KleanKutChaos listing supplies the featured digital artwork only. The featured KleanKutChaos file is the design source for this tutorial, and this tutorial does not claim that the pictured combination was physically tested with the listing files.
What you’ll need
- Goth Pottery SVG Bundle Part 2 with snake-cup and haunted-tableware artwork from the featured KleanKutChaos listing
- One factory-made freestanding two-tier countertop shelf riser with a published weight rating, intact nonslip feet, rigid joints, and smooth flat vertical front aprons
- Empty mugs you plan to display, plus their combined measured weight; keep hot, wet, cracked, or unusually heavy vessels off the project while planning
- Adhesive craft vinyl approved by its maker for the riser's exact sealed finish, in one to three colors such as cream, muted sage, and smoky gray
- Transfer tape matched to the selected vinyl; avoid extra-strong tape unless the vinyl maker specifically calls for it
- Cricut, Silhouette, or similar cutting machine with current software, a clean fine-point blade, and the mat specified for the vinyl
- Low-lint cloths and the mild surface cleaner approved by the riser and vinyl makers; never mix cleaners
- Paper, pencil, ruler, flexible tape measure, painter's tape or low-tack placement tape, and a full-size paper layout template
- Weeding hook or tweezers, scraper or felt squeegee, small scissors, and scrap vinyl for test cuts
- Kitchen scale or luggage scale suitable for weighing the empty mugs together, if the riser's rating requires a load check
- Small level, nonslip shelf liner cut smaller than the riser's footprint if its maker permits one, and a stable dry countertop
- Safety glasses and any protective equipment required by the cutter, blade, cleaner, vinyl, and furniture makers
How to make it
- 1
Choose a genuinely stable riser
Use a commercially made, freestanding riser with an intact frame, flat feet, rigid joints, and a weight rating that covers the empty mugs plus a reasonable margin. Reject a cracked, wobbly, folding, wall-mounted, improvised, or unlabeled stand. The front apron must be broad enough for decoration without placing vinyl on the shelf surface or structural joints.
- 2
Pick a safe display location
Set the undecorated riser on a dry, level counter well away from the edge, sink, dishwasher vent, cooktop, kettle, toaster, candle, direct sun, and under-cabinet heat. Confirm that cabinet doors, appliance doors, cords, and normal food preparation will not strike it. Keep the entire setup out of required work aisles and children's reach.
- 3
Inventory and weigh the mugs
Inspect each empty mug for chips, cracks, unstable feet, or awkward handles. Weigh the intended set and compare the total with the riser's published rating, distributing the load as its maker directs. Plan the heaviest stable mugs on the lower level and leave enough clearance to lift every mug without hitting the shelf above.
- 4
Map no-vinyl zones
Mark every horizontal shelf top, underside contact point, foot, joint, fastener, edge, handle path, and cup-contact area as off-limits. Measure only the smooth vertical front aprons. Leave at least a half-inch border—or more if either maker requires it—around apron edges, seams, corners, and hardware so the design cannot catch during cleaning or handling.
- 5
Test the surface discreetly
Clean a hidden section by the riser maker's method and let it dry completely. Apply a small sample of the chosen vinyl and transfer tape, then remove or inspect it after the makers' stated interval. Stop if the finish softens, lifts, clouds, stains, reacts with adhesive, or will not release the transfer tape cleanly.
- 6
Clean and stabilize the blank
Remove every mug and accessory. Wipe the front aprons with only the approved cleaner, removing grease without flooding joints or unfinished edges, and allow full drying time. Place the riser on its normal surface, verify all feet contact evenly, and correct the location rather than shimming or modifying the frame.
- 7
Build a full-size paper layout
Trace each usable apron rectangle on paper. Arrange printed or paper-cut snake, cup, crescent, and foliage silhouettes inside the safe borders. Keep long snakes running horizontally, avoid narrow details at corners, and view the mockup from standing distance with empty mugs temporarily placed on the shelves.
- 8
Prepare a cuttable working copy
Duplicate the purchased artwork and preserve the originals. Select one broad snake or snake-cup focal plus a few sturdy accents for each apron. At final size, remove isolated specks and fragile interior lines smaller than the vinyl maker recommends; do not distort the artwork or turn the entire bundle into tiny decals.
- 9
Plan colors and application order
Limit the riser to one, two, or three compatible vinyl colors. Slice the composition into adjacent shapes whenever possible instead of stacking full layers, which creates thick edges that catch a cloth. Mark the paper template with centerlines and note which color and motif belongs on each apron.
- 10
Run a material test cut
Place a small vinyl scrap on the correct mat, choose the closest manufacturer material setting, and cut a crescent or leaf. Confirm that the blade cuts the vinyl cleanly without slicing through the backing. Adjust only one setting at a time and replace a worn blade or damaged mat rather than forcing extra pressure.
- 11
Cut and weed the motifs
Cut each color with enough surrounding backing to keep it square. Weed from the outside inward while the sheet stays flat, then remove intended openings in the cup, snake coils, leaves, and crescents. Compare every weeded piece with the software preview before discarding scraps, and secure small waste where children or pets cannot reach it.
- 12
Apply transfer tape
Use the transfer tape specified for the vinyl. Attach a small section first, then burnish outward with a scraper as the maker directs. Flip and burnish the backing side. Trim excess tape into a manageable rectangle while keeping the vinyl itself safely inside the no-vinyl borders.
- 13
Dry-fit with a hinge
Align the taped design on the first apron using the paper centerlines. Hold one edge with a painter's-tape hinge placed outside the motif, stand back to check level and balance, and confirm no part crosses onto the shelf top, underside, corner, joint, or foot. Reposition before exposing adhesive if the riser or design looks crooked.
- 14
Transfer from the center outward
Lift the design on its tape hinge, peel the vinyl backing away at a low angle, and lower the adhesive gradually. Burnish from the anchored center toward the ends to push air outward rather than trapping it. Support the apron with one hand only if the riser maker permits it; never twist the shelf or press hard enough to loosen a joint.
- 15
Remove tape and add accents
Peel transfer tape slowly back over itself at the angle recommended by its maker. If vinyl lifts, lay the tape back down and reburnish instead of pulling harder. Apply remaining colors and accents with the same measured method, keeping every piece within its marked apron and avoiding stacked edges where possible.
- 16
Cure, load, and stability-check
Leave the empty riser undisturbed for the vinyl maker's full cure interval. Then place the heaviest approved empty mugs on the lower shelf first and add upper mugs one at a time, centering each base fully on the horizontal surface. Gently test normal lifting from several angles. Remove the display from service if it rocks, slides, bows, tips, sheds vinyl, blocks a cabinet, or brings a handle over the counter edge.
Practical finishing tips
- One large snake silhouette and one cup motif read more cleanly on a narrow apron than seven miniatures.
- Use the same vinyl family for all colors so thickness, tack, finish, and cleaning guidance stay consistent.
- Photograph the paper mockup with a ruler in frame before weeding; it becomes a reliable placement map.
- Keep the lower apron composition slightly bolder than the upper one so the display feels visually grounded.
- Lift mugs straight up by their handles rather than sliding glazed bases across the shelf or catching a vinyl edge.
- Dust with a dry or barely damp soft cloth according to both makers; never soak the riser, spray cleaner onto it, or put it in a dishwasher.
Troubleshooting
Return to the full-size paper template and mark matching centerlines on low-tack tape outside the decal area. Split an extra-long composition into two balanced motifs with a deliberate gap instead of trying to steer one floppy transfer sheet.
Lay the transfer tape down again, burnish the backing side, and peel the backing away at a lower angle. If the hidden-area test also failed, switch to a vinyl and tape combination approved for the finish rather than scraping harder.
Pause before the full motif is down, lift only the unattached transfer-tape section, and reburnish from the last smooth point outward. For a cured bubble, follow the vinyl maker's guidance; do not puncture the riser finish or heat the decal without explicit instructions.
Stop and remove the remaining tape without enlarging the damaged area. The finish and adhesive system are incompatible or insufficiently cured. Do not cover damage with more vinyl; repair or replace the riser according to its maker before using it for display.
Unload it immediately. Verify a level, clean counter; intact feet; tight factory joints; centered mug bases; and a total load below the stated rating. Do not add improvised wedges, adhesive feet, hooks, or counter fasteners to compensate for a damaged or unsuitable stand.
Change the mug position or reduce the collection. Keep every handle inside the riser's footprint and preserve enough vertical clearance for a straight lift. Do not store an ill-fitting mug sideways or let it overhang the counter.
Ways to make it yours
Use a single cream snake-and-crescent silhouette across each apron for faster weeding and a quieter Victorian look.
Display cool, dry, factory-sealed tea tins instead of mugs, keeping every container base on the undecorated horizontal shelves and staying below the same load limit.
Choose removable vinyl specifically approved for the finish, complete the same hidden-area test, and understand that clean removal still depends on coating age and condition.
Cut the motifs from cardstock and place them in separate freestanding acrylic sign holders in front of the riser when its finish cannot safely accept adhesive.
Keep crafting
- DIY Haunted Teacup Halloween Tea-Towel Ladder With Cricut HTV — Dress a small countertop display ladder with three washable cotton towels featuring haunted teacup, bat-teapot, and celestial spoon motifs cut from heat-transfer vinyl.
- DIY Kitchen Witch Recipe Card Carousel With Cricut Print Then Cut — Turn a ready-made rotary index-card file into a durable kitchen-witch recipe carousel with printable dividers, handwritten 4-by-6 cards, and a calm gothic palette.
- DIY Gothic Apothecary Drawer Labels With Removable Vinyl — Turn a plain mini-drawer cabinet into functional gothic storage with nine ornate frame decals, readable center labels, and a reusable placement jig.
Inspiration & further reading
This is an original Klean Kut Halloween Crafts project inspired by approachable techniques shared across trusted craft and home sources. Explore Cricut Vinyl instructions, Cricut Transfer Tape Instructions and U.S. Consumer Product Safety Commission Art and Craft Safety Guide for more ideas and technique background.