
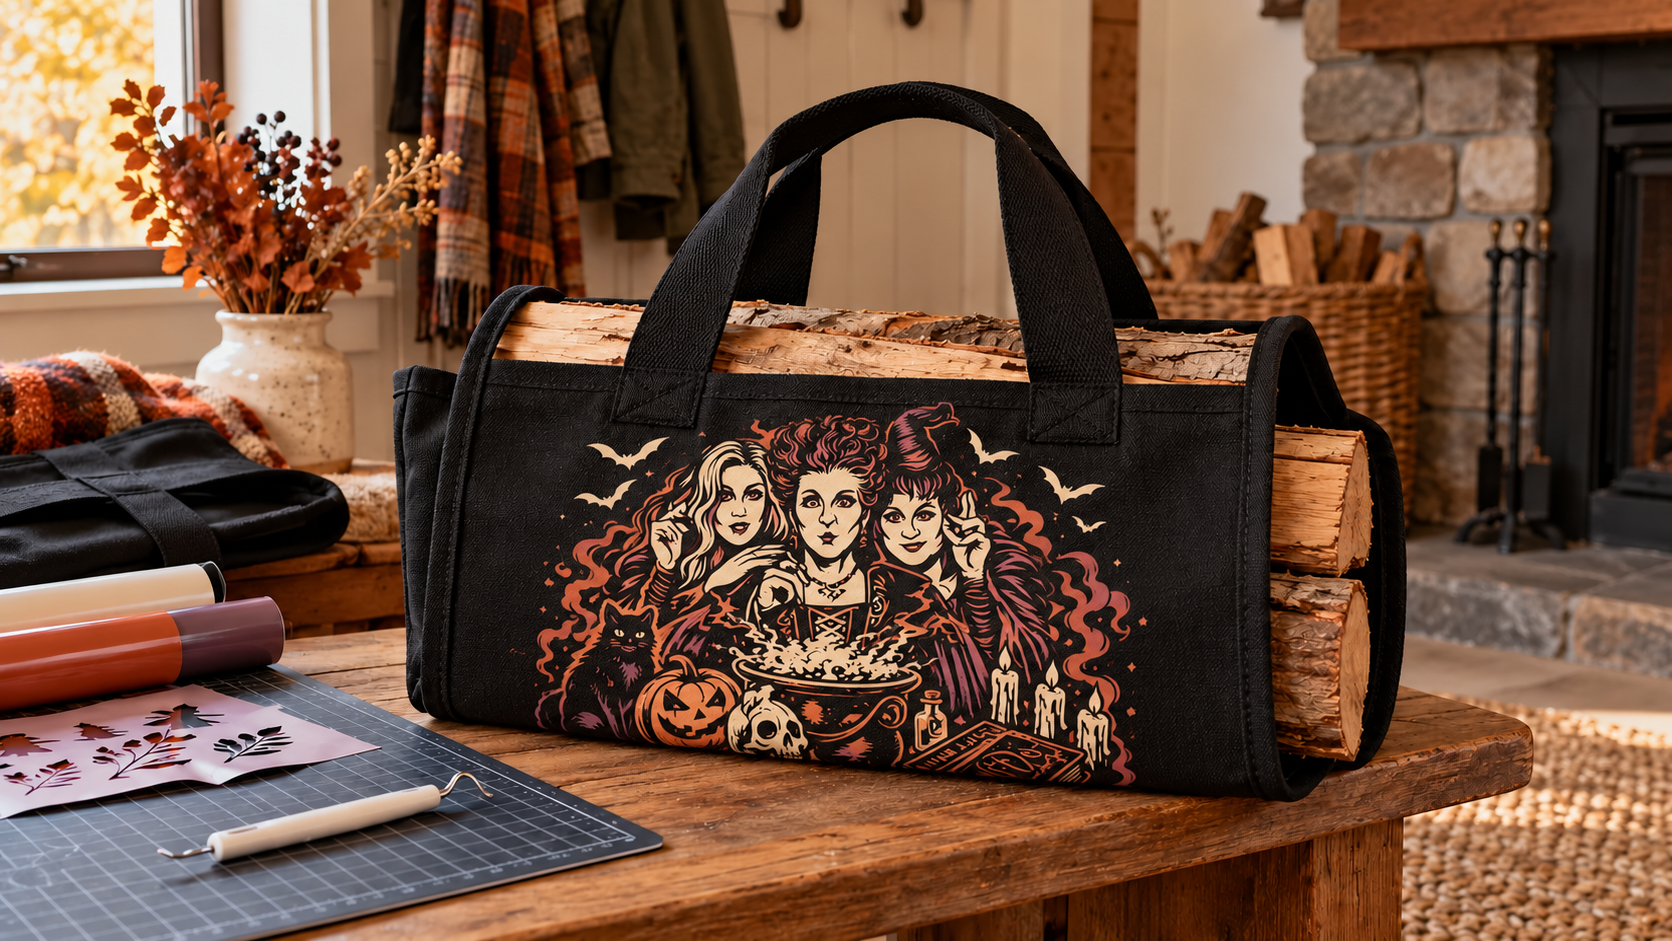
A sturdy open-ended canvas carrier keeps bark and loose chips contained while moving a modest armload of firewood. This project starts with a complete factory-made carrier whose handles, reinforcement, stitching, and published load guidance are already suited to the job. Three witch silhouettes become the exterior focal point in cream, muted rust, and dusty plum HTV, while handles, stress points, seams, reinforced edges, the base, interior, and all log-contact zones stay undecorated.
This is an original project plan based on ordinary home-cutter and heat-transfer-vinyl methods. Canvas fiber, dyes, coatings, waterproofing, seam construction, handle reinforcement, load rating, HTV formula, press model, platen, pressure, blade, mat, design detail, and care directions can all change the result. Follow the current instructions for the exact carrier, vinyl, cutter, mat, and heat tool, and complete a same-material test before pressing the finished blank. The KleanKutChaos listing supplies the featured digital witch artwork only. The featured KleanKutChaos file is the design source for this tutorial, and this tutorial does not claim that the pictured combination was physically tested with the listing files.
What you’ll need
- Halloween Witch Trio SVG Portrait from the featured KleanKutChaos listing
- One complete factory-made open-ended firewood carrier with a readable fiber and care label, intact reinforced handles, sound stitching, and a published load limit; choose smooth cotton or cotton canvas only when its maker permits the planned heat
- A same-fiber scrap or inconspicuous test area approved by the carrier maker
- Heat-transfer vinyl approved for the exact fabric and pressing conditions, in one to three compatible colors such as cream, muted rust, and dusty plum
- Cricut, Silhouette, or similar cutting machine with current software, a clean fine-point blade, and the mat specified for the HTV
- Heat press, EasyPress-style tool, or iron permitted by both the carrier and HTV makers, plus a firm heat-safe pressing surface
- Pressing mat or pad, protective sheet, parchment, pressing cloth, and heat-resistant tape only when the exact HTV and heat-tool instructions call for them
- Paper, pencil, ruler, flexible measuring tape, low-tack placement tape, and a full-size paper mockup of the exterior design
- Weeding hook or tweezers, small scissors, lint roller, and scrap HTV for test cuts
- Heat-resistant gloves if required by the heat-tool maker, safety glasses, and any other protective equipment specified by the material and tool makers
- Two or three clean, cool, dry split logs for the final fit test, each free of nails, screws, active insects, wet sap, smoldering material, and dangerously sharp projections
How to make it
- 1
Choose a carrier made for firewood
Select a complete commercially made carrier with intact handles, dense stitching, reinforced attachment points, a flat base, and a published load limit. Reject improvised fabric, torn handles, loose seams, brittle coatings, unknown fiber content, or a blank that is not explicitly intended for firewood. Confirm that the carrier maker permits heat at the HTV maker's required temperature before continuing.
- 2
Choose a safe work and storage plan
Do all cutting and pressing on a stable, dry, heat-safe work surface well away from a fireplace, stove, heater, fuel, sparks, and stored firewood. Plan to keep the finished empty carrier in a cool dry storage area—not on a hearth, stove, or hot masonry—and decide where cool logs will be loaded and unloaded without blocking a doorway or walkway.
- 3
Prewash only when permitted
If both the carrier and HTV makers call for prewashing, wash the empty carrier exactly as its care label directs and omit fabric softener when prohibited. Dry it fully, then inspect for shrinkage, dye transfer, puckering, weakened stitching, or coating changes. If washing is not permitted, use the blank preparation method supplied by the makers instead.
- 4
Map every structural no-press zone
Lay the empty carrier flat and trace the usable exterior panel. Mark handles, handle attachment boxes, top and bottom reinforced bands, side seams, hemmed edges, the base, folds, maker labels, interior, and all areas that touch or rub logs as off-limits. Add the larger of a one-inch buffer or the clearance required by either maker around stress points and seams.
- 5
Check the design while the carrier is shaped
Place a folded blanket inside only for this paper-layout step so the carrier resembles its loaded shape without bark or sharp wood. Tape the paper outline to the safe exterior zone, lift both handles together, and confirm the motif stays visible without crossing a fold, handle path, or high-flex area. Remove the blanket before any heat work.
- 6
Prepare a durable working copy
Duplicate the purchased file and preserve the original. Choose the three-figure portrait, then simplify isolated specks, extremely fine hairlines, and narrow openings that fall below the HTV maker's minimum recommendation. Keep the silhouettes broad enough for canvas texture and separate small stars or botanical accents from the main group.
- 7
Plan colors and layer order
Limit the project to one, two, or three HTV colors that their maker approves for layering. Prefer adjacent color blocks and knockout spaces instead of stacking full-size silhouettes, which adds bulk and stiffness. Record the intended press order, which layers may overlap, and the exact reduced press time required for intermediate layers.
- 8
Run a test cut
Mirror the artwork when the selected HTV requires carrier-side cutting, orient the material on the mat exactly as directed, and cut a witch-hat point, one face opening, and a small botanical accent. Weed the test and confirm that the vinyl cuts cleanly without slicing through its carrier sheet.
- 9
Press a same-material test
Use comparable carrier fabric or the maker-approved hidden test area. Follow the current heat guide for temperature, time, pressure, cover, peel, and cooling. Let the test reach room temperature, flex it, and inspect for scorching, shine, dye change, coating damage, adhesive strike-through, edge lift, or fabric distortion. Stop if the combination fails.
- 10
Cut and weed the final layers
Cut each color only after the test passes. Weed from the outside inward while the carrier sheet remains flat, then compare every opening with the software preview. Secure tiny scraps where children and pets cannot reach them and keep the finished transfers flat and free of lint.
- 11
Build a level pressing surface
Turn the carrier so only the intended exterior panel lies over the firm heat-safe pressing surface. Roll or fold every handle, seam, base layer, and reinforced edge completely outside the platen area. Never press over multiple fabric layers, hidden hardware, a log, a pocket, a handle attachment, or an unknown coating.
- 12
Align the first layer
Lint-roll the cooled panel, find its vertical and horizontal centers without sharply creasing the fabric, and position the paper mockup first. Replace it with the first HTV carrier sheet and use heat-resistant tape only if the heat-tool and HTV makers allow it. Recheck every structural buffer before turning on the press.
- 13
Press by the exact material guide
Preheat only if the HTV instructions require it, then press the first layer using the specified temperature, time, pressure, cover, and peel method. Lift the tool straight up rather than sliding it. Keep hands, handles, seams, and cords away from the hot plate and allow the layer to cool for the required interval.
- 14
Add approved additional colors
Align each later color with the cooled first layer. Protect previously applied vinyl exactly as directed and use the shortened intermediate press only when the HTV maker specifies one. Do not stack materials that are not approved for layering, and never compensate for a weak bond by guessing at extra temperature, time, or pressure.
- 15
Complete the final press and cure
Apply only the maker-approved final press, peel at the stated temperature, and let the empty carrier cool flat to room temperature. Inspect every edge in bright light, then leave it unloaded for the complete cure interval. Do not wash, fold tightly, stack logs, or expose the carrier to dampness during cure.
- 16
Perform an empty carry test
After cure, lift the empty carrier with both handles, walk a short clear route, and set it down without dragging. Confirm that the motif does not crack across a fold and that no vinyl edge reaches a grip, reinforcement, seam, base, or log-contact area. Retire or repair the carrier according to its maker if any stitching or handle shifts.
- 17
Load cool dry wood conservatively
Wearing work gloves appropriate for the wood, place two or three cool, dry, clean split logs evenly across the base without exceeding the maker's limit. Keep sharp ends away from fabric, carry with both handles close to the body, and unload before approaching the hearth. Never use the carrier for hot, smoking, smoldering, ash-covered, chemically treated, wet, moldy, or contaminated material.
Practical finishing tips
- A 9- to 11-inch-wide witch trio usually reads more cleanly on canvas than three small full-detail portraits, but size from the measured safe panel rather than a generic blank.
- Use a full-size paper mockup while the carrier is gently shaped; a design centered on flat fabric can look low or distorted when the handles lift.
- Keep the lowest HTV comfortably above the reinforced base band so stacked logs never grind against a decal edge.
- Place fine stars and leaves beside—not beneath—the figures to reduce stacked layers and preserve flexibility.
- Photograph the carrier's care label and the successful test settings before pressing the final transfer.
- Shake bark and chips out outdoors after each use, then clean and store the carrier only as its maker directs; never sweep debris toward a lit fireplace.
Troubleshooting
Stop and compare the exact fiber, coating, weave, press surface, temperature, pressure, time, peel, and cooling sequence with the current material guide. Repeat the full process on scrap. If the weave or finish remains incompatible, use a separate sew-on decorative panel made from approved fabric rather than adding unapproved heat.
Stop pressing and let the carrier cool completely. Excess heat, pressure, or an incompatible finish may be responsible. Do not cover damage with more vinyl; repeat the test at only the maker-approved conditions or choose a different carrier-and-HTV combination.
Return the carrier sheet to its original position and follow the specified peel temperature and repress instructions. Confirm that the two materials are approved for layering. Never raise the temperature or extend the press beyond the official guidance to force adhesion.
The motif may cross a high-flex fold or be too wide. Remove it only by a method approved for the fabric, then recut a smaller working copy that stays on the flat center panel. Do not stiffen the carrier with an unapproved insert or adhesive board.
Set the carrier down immediately and unload it while wearing appropriate gloves. Remove the damaged log from use, inspect the carrier for cuts and pulled stitches, and stop using it if structure is affected. Vinyl should never enter the interior or log-contact zone.
Set it down without twisting, unload logs one at a time, and reduce the load below the published limit. Use a cart or make additional trips rather than dragging, one-handed carrying, or asking the handles to support an awkward oversized log.
Ways to make it yours
Cut the trio and a crescent as one cream silhouette for faster weeding, a thinner transfer, and a classic black-and-ivory look.
Use one central witch figure with larger rust and plum leaves on either side, keeping every motif inside the same structural clearances.
Use the layout on a separate complete factory-made cotton blanket carrier when no firewood is handled, following that tote's own load, heat, and care directions and keeping straps and seams bare.
Press the artwork onto a separate compatible cotton panel and attach it only by a carrier-maker-approved removable method outside all stress and contact zones when the firewood carrier itself cannot safely accept heat.
Keep crafting
- DIY Witchy Halloween Countdown Flip Calendar With Cricut or Silhouette — Make a reusable tabletop Halloween countdown with sturdy flip cards, crisp vinyl decoration, and a dramatic witch-trio centerpiece.
- DIY Gothic Witch Folding Room Divider With Removable Vinyl — Transform a smooth three-panel folding screen into removable gothic witch décor with large silhouettes, celestial borders, and careful hinge clearance.
- DIY Haunted Countryside Door Draft Stopper With Cricut HTV — Decorate a removable cotton-canvas draft-stopper cover with a layered haunted-countryside panorama while keeping seams, closures, door hardware, vents, and required clearances safe.
Inspiration & further reading
This is an original Klean Kut Halloween Crafts project inspired by approachable techniques shared across trusted craft and home sources. Explore Cricut Everyday Iron-On instructions, Cricut Heat Guide and U.S. Consumer Product Safety Commission Art and Craft Safety Guide for more ideas and technique background.