
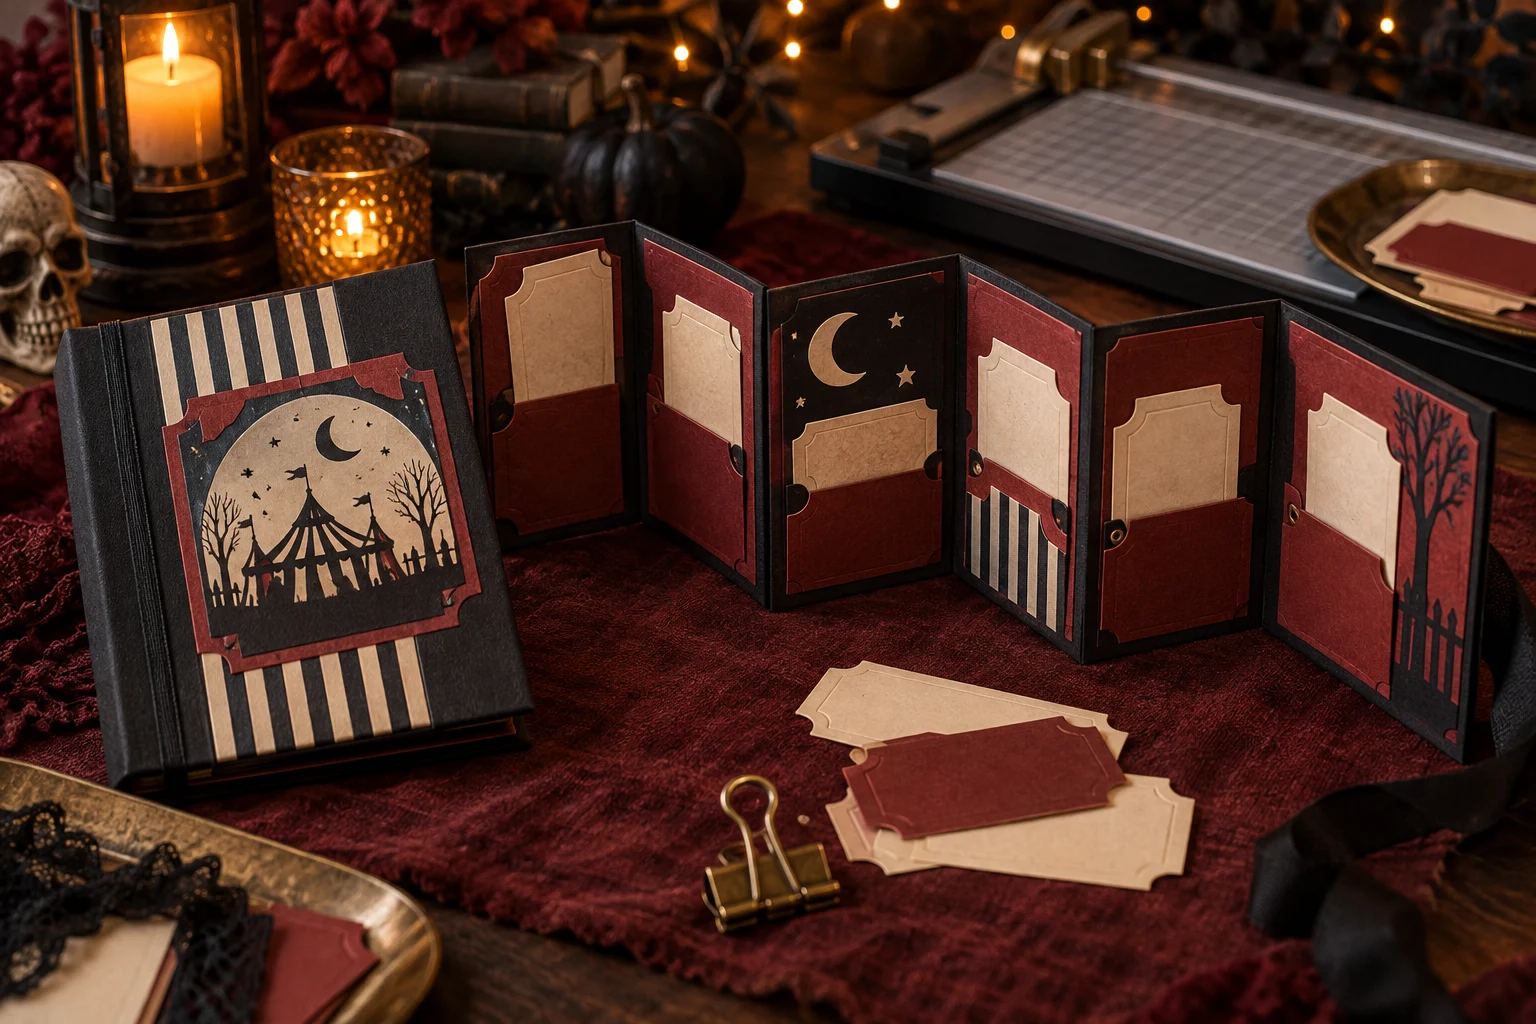
This compact keepsake album gives paper movie tickets, wristbands, photo strips, and handwritten film notes a safer home than a loose drawer. Six connected panels fold into a neat 5-by-7-inch book, while shallow cardstock pockets keep each souvenir visible and removable. A simplified horror-clown silhouette on the cover creates the spooky focal point without forcing tiny vinyl details onto a flexible spine.
This is an original project plan based on common accordion-book, paper-pocket, and adhesive-vinyl methods. Ticket size and coating, paper acidity, cardstock grain, book-board thickness, adhesive moisture, hinge spacing, scoring pressure, vinyl adhesive, transfer-tape tack, blade condition, mat grip, temperature, and humidity all affect the result. Build the paper prototype and test every exact material before assembling the keepsake. Follow the current directions from each cardstock, board, adhesive, vinyl, transfer-tape, machine, blade, mat, scoring-tool, and paper-trimmer maker. The featured KleanKutChaos file supplies the decorative cover artwork; this tutorial simplifies it for a bold silhouette and does not claim that the pictured material combination was physically tested with the listing design.
What you’ll need
- 1990 Pennywise Horror Clown SVG from the featured KleanKutChaos listing
- Two pieces of acid-free book board cut to 5 by 7 inches, or two sturdy pre-cut chipboard covers
- Two pieces of black book cloth or heavyweight cover paper with at least a three-quarter-inch wrapping margin
- Three to four sheets of 12-by-12-inch heavyweight, lignin-free cardstock for the accordion base
- Three sheets of contrasting cardstock for six shallow ticket pockets and optional labels
- A few sacrificial sample tickets cut to the largest real ticket size you expect to store
- Black permanent adhesive craft vinyl and compatible transfer tape
- Cricut-, Silhouette-, or similar cutting machine with a clean fine-point blade
- Compatible clean cutting mats plus a scoring stylus, wheel, or board approved for the cardstock
- Paper trimmer, metal ruler, pencil, bone folder, self-healing mat, and craft knife if you are trained to use one
- Acid-free, photo-safe double-sided tape or bookbinding adhesive approved for paper keepsakes
- Low-tack painter's tape, copy paper, scissors, scraper, brayer, weeding tool, and fine tweezers
- Clean release paper, waxed paper or silicone sheet approved by the adhesive maker, and several flat weights
- Optional corner rounder, archival photo corners, small glassine envelopes, and acid-free labeling pen
- Eye protection, bright task light, and a lidded container for blade, vinyl, and paper scraps
How to make it
- 1
Measure the keepsakes first
Sort the ticket stubs and flat souvenirs you may store, but do not trim originals. Measure the tallest and widest pieces and note any heat-sensitive thermal tickets. Plan pockets at least one eighth inch wider on each side and one quarter inch shorter than the visible ticket height so items can be removed without bending.
- 2
Prototype one panel and pocket
Cut a 5-by-7-inch copy-paper panel and a scrap pocket with half-inch side and bottom tabs. Fold and tape the pocket temporarily, insert only a sample ticket, and confirm finger clearance. Increase the pocket width if the sample bows, catches, or needs force. Keep originals away from wet glue and cutting tools.
- 3
Plan the six-panel accordion
Lay out six 5-by-7-inch panels in a row with alternating mountain and valley folds. If your cardstock cannot span the full length, divide the structure into two three-panel strips and add a one-inch joining tab behind the center fold. Mark the front cover, back cover, panel order, and pocket opening direction on the prototype.
- 4
Simplify the cover artwork
Open a duplicate of the featured SVG and preserve the original. Keep the outer head, hair, collar, and strongest facial-shadow shapes, but remove isolated specks, narrow slivers, tiny wrinkles, and details that will not weed cleanly at the planned 3.5-to-4-inch height. Weld intentional overlaps and close broken paths.
- 5
Make a full-size cover proof
Print or cut the simplified silhouette and any stripe or frame elements on copy paper at final size. Center them on a 5-by-7-inch paper cover, leaving at least half an inch around every edge and three quarters of an inch beside the spine. Fold the prototype closed to make sure no artwork crosses a moving hinge.
- 6
Cut and score the accordion base
Set the folds in the design file to score and the panel outlines to cut. Test the score on an offcut, then cut the cardstock strips with the grain running parallel to the folds when possible. Fold each score gently with the bone folder, alternating directions, and reject any hinge that cracks deeply or separates.
- 7
Join and square the strips
If using two strips, overlap the joining tab behind a full panel with acid-free double-sided tape or a thin, even layer of approved adhesive. Align the top and bottom edges before pressing. Fold the complete accordion, place it between clean release sheets under light flat weights, and let the adhesive set for its full specified time.
- 8
Cut and test the pockets
Cut six pockets from contrasting cardstock with half-inch tabs on the sides and bottom and an optional shallow thumb notch at the top. Score before folding. Assemble one pocket on a scrap panel, insert a sample ticket, close the accordion, and verify that the pocket does not cross a hinge or add enough bulk to force the panels apart.
- 9
Attach the remaining pockets
Fold tabs behind each pocket and apply adhesive only to the tabs, keeping the center cavity dry. Use an alignment jig so all pocket bottoms sit at the same height. Alternate bulky inserts between front- and back-facing panels if needed, then press each panel flat under clean release paper while the adhesive sets.
- 10
Wrap the book-board covers
Cut two board covers and two larger pieces of book cloth or cover paper. Dry-fit first, then adhere each board to the center, miter the outer material without exposing the board corners, and wrap opposite edges in pairs. Burnish from the center outward and cure flat under light weights according to the adhesive instructions.
- 11
Attach the accordion to the covers
Center the first accordion panel on the inside front cover and the last panel on the inside back cover, leaving equal margins and keeping the first fold just clear of the board edge. Adhere one cover at a time, check that the book opens fully without pulling, then close it between release sheets under light flat weights until set.
- 12
Test-cut, weed, and transfer the vinyl
Test the exact vinyl and cover surface before cutting the final silhouette. Cut without mirroring, weed under bright light, and discard any stretched contour. Apply compatible transfer tape, align from the paper proof, hinge the design at the center with low-tack tape, and burnish one half at a time. Peel the carrier back slowly at an acute angle.
- 13
Load and label the album
Let the vinyl settle for the maker's recommended time. Add only clean, dry keepsakes, placing fragile thermal tickets inside acid-free glassine sleeves or photographing them before storage because their printing can fade. Label pockets on removable inserts rather than writing on original tickets, then open and close the full album several times to confirm free movement.
- 14
Store it for long-term use
Stand the album upright only if the covers remain square and the pockets are lightly filled; otherwise store it flat in a cool, dry, dark location. Keep it away from direct sun, heat, damp basements, adhesive fumes, and pressure from heavier books. Review the pockets periodically for fading, tackiness, warping, or dye transfer.
Practical finishing tips
- Keep the cover silhouette bold and at least 3.5 inches tall; enlarging it usually makes weeding more reliable than adding pressure.
- Use a scrap-cardstock alignment jig for every pocket so a slightly crooked first panel does not multiply across the accordion.
- Photograph each ticket front and back before storage, especially thermal paper that may fade even under good conditions.
- Alternate thick wristbands and photo strips between panels so the closed album remains balanced instead of bulging on one side.
- Round only the pocket corners, not the scored accordion hinges, to preserve maximum strength at every fold.
- Write dates and film notes on removable acid-free inserts; never use pressure-sensitive labels directly on collectible tickets.
Troubleshooting
Remove the contents and check pocket-tab overlap, adhesive buildup, and fold direction. Thin or remake bulky pockets, reduce each panel to one flat keepsake, and never force the covers closed over stacked items.
The score may be too deep, the grain may run across the fold, or the cardstock may be brittle. Recut the affected strip with a lighter score and compatible cardstock; do not rely on tape to repair a structural hinge holding originals.
Stop pulling and flex the empty pocket open from the sides. Remove the sample, widen the pocket pattern or deepen the thumb notch, and remake it. Sleeved keepsakes need extra clearance beyond the bare-ticket measurement.
Moisture or uneven tension may be the cause. Let both covers dry between clean release sheets under equal light weights, or remake them with a lower-moisture adhesive and matching inside liners. Never press so heavily that the board dents.
The cover may be textured, dusty, uncured, or incompatible with the adhesive. Remove only as the material makers permit, simplify and enlarge the art, test a fresh scrap, and recut rather than adding heat or liquid sealer.
The accordion was likely attached too close to the board edge or off square. Carefully separate it only if the adhesive instructions allow, replace the affected end panel, and reattach with a narrow hinge gap confirmed on the paper prototype.
Ways to make it yours
Use alternating photo corners and pockets so each spread pairs a ticket with a 4-by-6-inch screening-night photo or mini review card.
Build four panels with plain rectangular pockets and one large solid cover silhouette to reduce scoring, assembly time, and weeding.
Replace original-ticket storage with removable rating cards for date, film, snacks, scare score, and favorite scene; keep the same reusable accordion structure.
Cut the simplified silhouette from black cardstock and mount it on a removable cream cover panel with acid-free paper adhesive, keeping all decoration away from the spine.
Keep crafting
- DIY Horror Clown Movie-Night Party Kit — Make a coordinated horror movie-night set with snack boxes, drink decals, table cards, and a bold feature sign.
- DIY Foggy Monster Layered Shadow Box — Layer vellum, torn paper, bare trees, and monster silhouettes into a misty dimensional scene for a shelf or gallery wall.
- DIY Horror Killer Lineup Table Runner With Heat-Transfer Vinyl — Turn a plain cotton runner into a dramatic Halloween centerpiece with eight coordinated horror silhouettes, careful spacing, and matte black heat-transfer vinyl.
Inspiration & further reading
This is an original Klean Kut Halloween Crafts project inspired by approachable techniques shared across trusted craft and home sources. Explore Cricut vinyl cutting and application guide and Cricut transfer tape instructions for more ideas and technique background.