
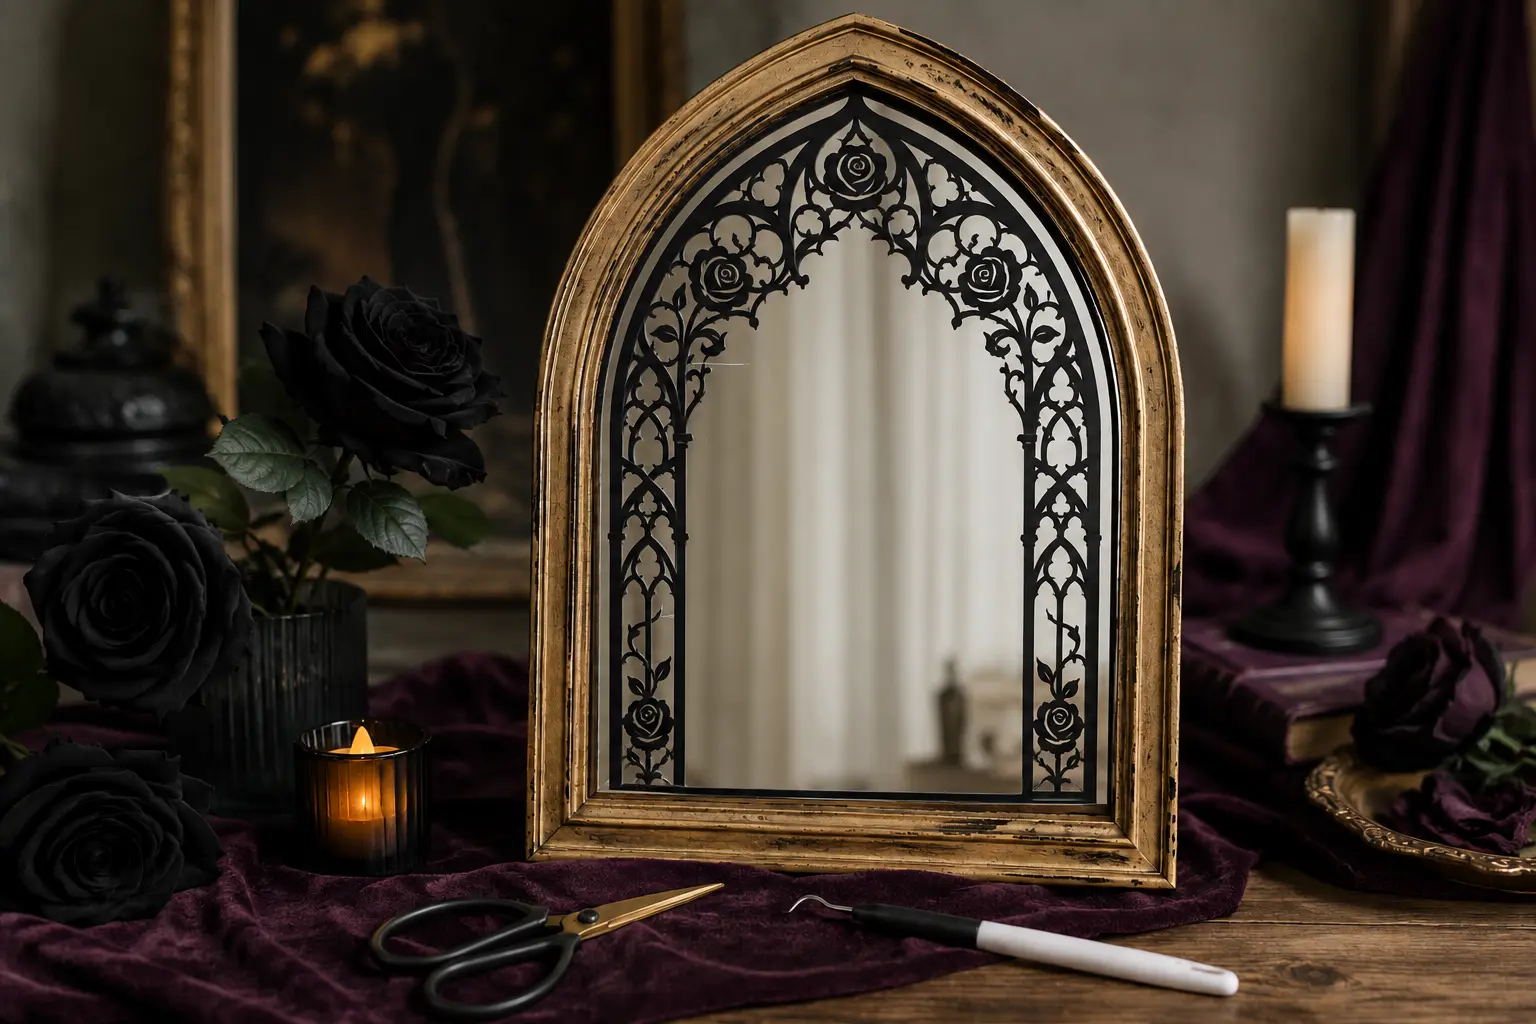
An arched mirror already has the bones of a cathedral window. Adding one open-center rose frame in matte black vinyl turns that familiar shape into a dramatic focal piece while preserving a useful area of reflection. This project plan is intentionally sized for detail: it favors one large design over several tiny decals and includes a paper test before any vinyl is cut.
Permanent vinyl is commonly used on smooth, nonporous surfaces, while painted-frame makeovers depend on careful cleaning, light surface preparation, and patient curing. This original project brings those approachable methods together in a restrained black-and-gold finish. Because machines, blades, vinyl, paint, and mirror coatings vary, use the maker settings recommended for your exact materials and test every unfamiliar combination on a scrap first.
What you’ll need
- Thrifted arched mirror or flat mirror in a frame, ideally 12–24 inches tall
- Gothic rose frame cut file from the featured 10-design bundle
- Matte black permanent adhesive vinyl
- Standard-grip transfer tape, scraper, weeding tool, and fine-point blade
- Cutting machine and a clean, adequately sticky cutting mat
- Plain paper or inexpensive cardstock for the full-size placement test
- Lint-free cloths, mild glass cleaner, and 70% isopropyl alcohol
- Painter’s tape, ruler, removable marker, and small level
- 220-grit sanding sponge if the frame material can safely be scuffed
- Primer suited to the frame material and antique-gold craft or furniture paint
- Small paintbrush and optional water-based clear coat compatible with the paint
- Wall hardware rated for the mirror’s weight or a stable display stand
How to make it
- 1
Inspect the mirror and frame
Check for sharp chips, loose backing, cracks, or an unstable hanger before decorating. Tighten safe-to-reach hardware and skip any mirror with damage that could worsen while you work or hang it.
- 2
Choose a frame design that matches the silhouette
Pick one open-center design whose outer arch echoes the mirror shape. Measure the usable glass and size the artwork to leave at least a half-inch of breathing room from the frame. For very detailed artwork, a final width of roughly 10 inches or more is easier to cut and weed than a tiny version.
- 3
Make a full-size paper test
Cut the chosen design from plain paper or print its outline at final size. Center it on the mirror, step back several feet, and confirm that the open center leaves enough reflective area. Simplify fragile dots, hairline curls, or tiny floating pieces before using vinyl.
- 4
Prepare and paint the outer frame
Mask the mirror edge carefully. Clean the frame, lightly scuff only if its material allows, and apply a compatible primer followed by two thin coats of antique-gold paint. Keep paint out of seams, clips, and hanging hardware. Let every layer dry and cure for the time listed on its label.
- 5
Clean the glass without leaving residue
After the painted frame is fully cured, clean the exposed mirror with mild glass cleaner. Finish with a small amount of 70% isopropyl alcohol on a lint-free cloth, keeping liquid away from the mirror edges and backing. Let the surface dry completely.
- 6
Run a material test cut
Place a small scrap of the same vinyl on the mat and use the machine’s recommended permanent-vinyl setting as a starting point. Adjust only if the blade does not cut the vinyl cleanly while leaving the carrier sheet intact.
- 7
Cut and weed from large spaces inward
Cut the rose frame without mirroring because it will be applied to the front of the mirror. Weed the largest open areas first, then work toward roses, tracery, and curls. Hold narrow lines down with the weeding tool instead of pulling the surrounding vinyl quickly.
- 8
Align the decal with a center hinge
Cover the weeded design with transfer tape and mark its vertical and horizontal centers on the tape. Position it using a ruler and small level, then run painter’s tape vertically through the center to create a hinge. Compare the placement with the paper-test photo before committing.
- 9
Apply one half at a time
Lift one side, trim away that half of the backing paper, and lower the decal gradually while burnishing from the taped center toward the edge. Remove the center tape and repeat on the second half. Work slowly so the long arch stays square and the open center remains even.
- 10
Peel, settle, and hang safely
Peel transfer tape back at a very low angle, pausing to reburnish any lifting line. Avoid cleaning or handling the decal aggressively while the adhesive settles according to its manufacturer’s guidance. Reinstall backing and hardware, then hang with weight-rated fasteners or place the mirror on a stable stand.
Practical finishing tips
- Photograph the full-size paper test straight on; it becomes a quick alignment reference after the temporary template is removed.
- If the bundle’s most intricate frame is too dense at the available size, choose one with broader arches and fewer tiny rose details instead of forcing a difficult cut.
- De-tack overly aggressive transfer tape once on clean cotton so narrow vinyl lines release more gently onto glass.
- Keep the center reflective rather than filling it with text. The ornate border already supplies plenty of visual detail.
- Use a removable marker only on clean glass, test it in a hidden corner, and remove every guide mark before applying vinyl over that area.
Troubleshooting
The cut may be too shallow, the artwork may be too small, or the mat may not be holding the carrier sheet flat. Pause, test a slightly stronger cut on scrap, and enlarge or simplify the most delicate details if needed.
Fold the tape almost flat against the mirror and peel slowly. Reburnish each lifting section with a fingertip or scraper edge before continuing.
Stop before pressing the second half. Recheck the center marks and level, lift only the unburnished portion, and use the taped hinge to correct alignment.
Gently push small bubbles toward the nearest edge before the adhesive settles. For a stubborn isolated bubble, follow the vinyl maker’s guidance; do not scrape so hard that the mirror coating or vinyl is damaged.
The coating may not have cured or the tape may be too aggressive. Score the paint edge lightly with a craft knife, then peel tape back over itself. Touch up only after the surface is stable.
Ways to make it yours
Use a charcoal frame and matte black vinyl for a quieter monochrome piece that suits year-round gothic décor.
Choose one of the crescent-moon frames, paint the outer frame pewter, and add a few removable crystal-look accents outside the reflective center.
Place a short name and date inside the open center near the bottom, keeping the text large, restrained, and easy to weed.
Leave a beautiful wood or metal frame untouched and add only the black vinyl border for a faster, renter-friendly makeover.
Inspiration & further reading
This is an original Klean Kut Halloween Crafts project inspired by approachable techniques shared across trusted craft and home sources. Explore Cricut’s material-selection cheatsheet, Cricut’s wood sign preparation guide and Cricut’s beginner guide to permanent vinyl for more ideas and technique background.