
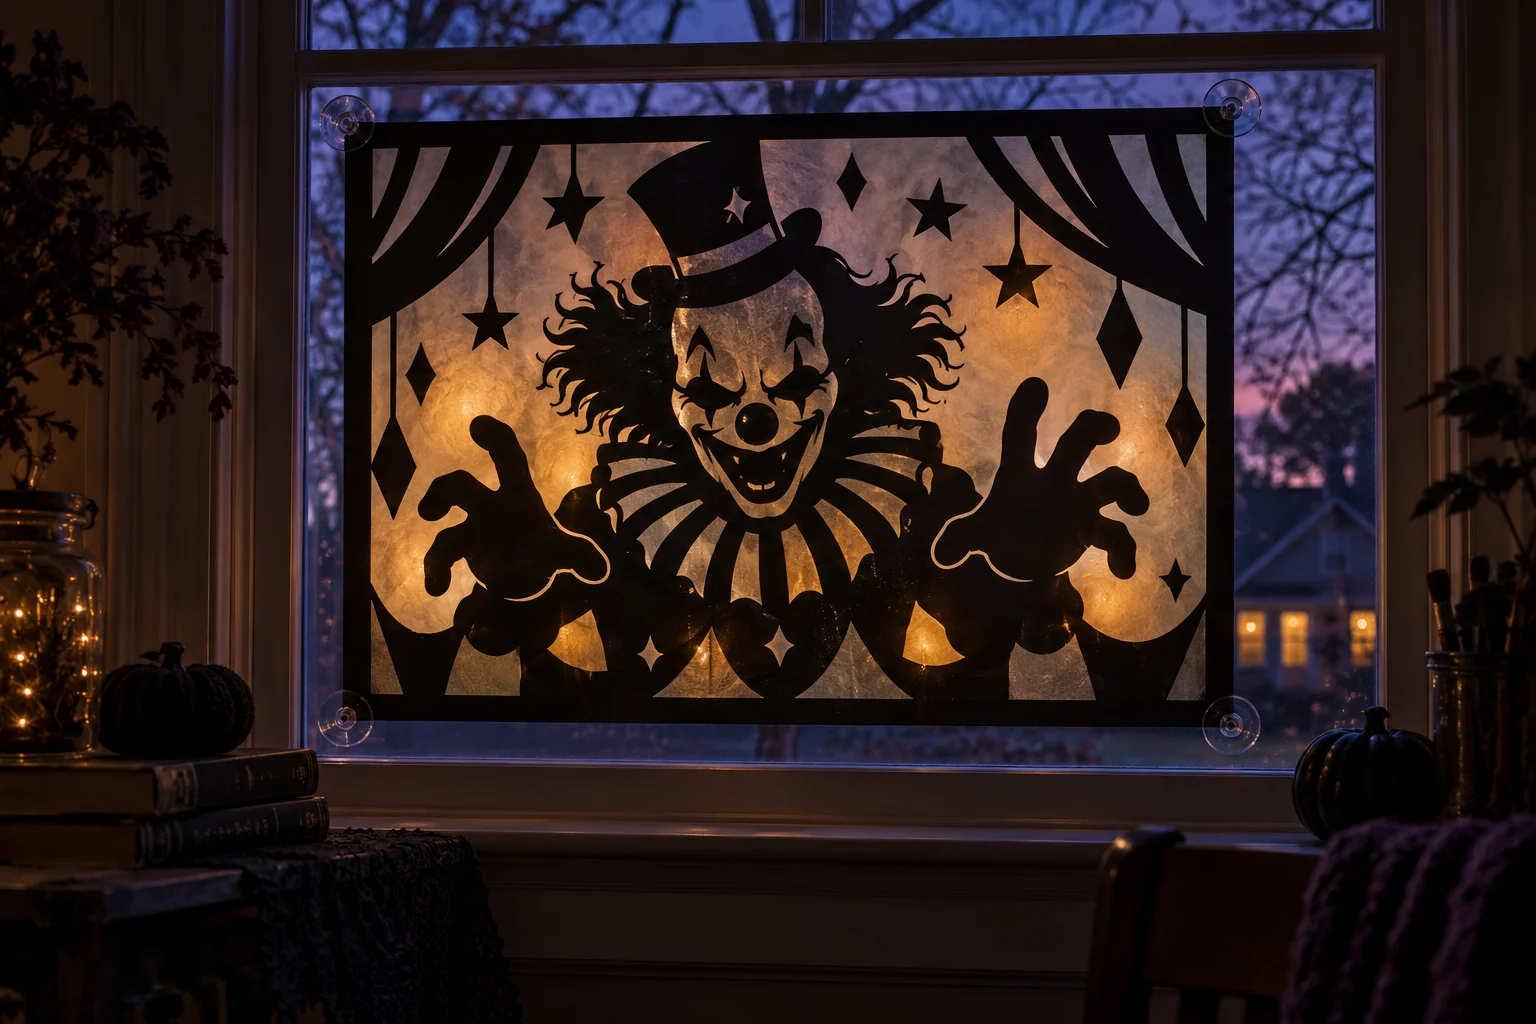
This removable window panel creates the look of an oversized cut-paper theater without applying a large decal directly to glass. The design is divided into manageable machine-mat sections, reassembled on a flat work surface, backed with translucent vellum, and supported by a lightweight frame. Clear suction mounts carry the finished panel inside the window, while battery-powered lights sit separately behind it so the paper is never wrapped around a light source.
This is an original project plan based on common cardstock cutting, tiled-paper assembly, and removable window-display methods. Window size, glass condition, condensation, direct sun, cardstock weight, vellum, artwork detail, blade condition, mat grip, adhesive, frame material, suction hardware, room temperature, humidity, and lighting clearance can all change the result. Make a full-size paper proof, test every exact material, and follow the current directions from the window, cardstock, vellum, adhesive, cutting-machine, blade, mat, suction-mount, and battery-light manufacturers. The featured KleanKutChaos bundle provides the decorative clown artwork; simplify a duplicate of the chosen file for paper cutting. The featured KleanKutChaos file is the design source for this tutorial, and this tutorial does not claim that the pictured combination was physically tested with the listing files.
What you’ll need
- Art the Clown 11-Design Bundle from the featured KleanKutChaos listing
- One indoor window that is not required for emergency escape, ventilation, a fire route, or frequent opening
- Removable paper template or kraft paper large enough to represent the finished panel
- Black solid-core cardstock or machine-compatible kraft board for the silhouette and border
- Smoky gray, white, or amber translucent vellum sheets for the back layer
- Lightweight black foam board or corrugated plastic strips for a rigid perimeter frame
- Cricut-, Silhouette-, or similar cutting machine with a clean blade approved for the chosen paper
- Compatible clean cutting mat, plus a longer mat if the machine and material support it
- Cutting-machine software, ruler, flexible measuring tape, pencil, and removable painter's tape
- Acid-free double-sided paper tape or adhesive approved for cardstock and vellum
- Self-healing cutting mat, guarded paper trimmer, craft knife, metal ruler, and eye protection
- Four or more clear suction cups with closed hooks, rated well above the completed display weight
- Small binder clips or closed split rings that fit the frame and suction hooks
- Two cool-running battery LED puck lights or a battery light bar with intact housing and accessible switch
- Lidded scrap container, lint-free cloth, and the window maker's approved cleaner
How to make it
- 1
Choose a safe display window
Use only an indoor-facing window that remains available for its normal lock, blind, curtain, ventilation, and cleaning functions. Do not cover an emergency egress window, exit sign, smoke alarm, heater, radiator, outlet, or frequently opened sash. Check for cracked glass, loose trim, heavy condensation, hot direct sun, or a sill too narrow to keep lighting separate from paper.
- 2
Measure and set a clear boundary
Measure the visible glass width and height inside the trim, then subtract at least two inches from every side so the frame, suction mounts, lock, and window edges stay accessible. Mark the finished size on kraft paper. Keep the display small enough to lift with two hands and light enough for the selected mounting hardware.
- 3
Simplify a duplicate of the artwork
Duplicate one bold clown design from the bundle and preserve the original file. Keep the main face, hat, collar, hands, and a few large carnival shapes. Remove isolated specks, hairline curls, narrow teeth, tiny eye details, and fragile gaps. Thicken bridges between connected areas and close open paths so every retained piece can survive cutting, lifting, and seasonal storage.
- 4
Create a border and divide the design
Place the simplified silhouette inside a rectangular border at the measured finished size. Divide the artwork into mat-sized tiles using straight seams that cross broad black areas rather than facial openings or narrow fingers. Add at least a quarter-inch hidden overlap to one side of each seam and label the tiles in software before cutting.
- 5
Make a full-size paper proof
Print the tiled outlines on copy paper, trim and tape them together, then hold the proof inside the window. Check the view from indoors and outdoors after dark without blocking the lock or hardware. Confirm that the face reads clearly from the intended viewing distance and that all suction points land on clean, flat glass.
- 6
Test-cut the smallest retained details
Place a scrap of the exact black cardstock on the selected mat and begin with the material maker's recommended setting. Cut one eye opening, one fingertip, a collar point, and an overlap tab. Confirm clean cuts without deep mat scoring. Adjust one setting at a time and replace a dull blade instead of repeatedly increasing pressure.
- 7
Cut and release the silhouette tiles
Cut each labeled tile with the same tested setup. After every cut, flip the mat and peel the mat away from the paper to reduce curling. Place each tile face down in order and move fragile interior scraps directly into the lidded container. Recut any torn bridge, fuzzy edge, incomplete corner, or stretched hand rather than patching visible details.
- 8
Cut the translucent backing
Create vellum tiles that cover the full interior opening and overlap one another by at least half an inch. Keep vellum seams away from the center of the face when possible. Test the exact vellum first because thin sheets can snag or wrinkle. Use a guarded trimmer for simple rectangles instead of adding unnecessary machine cuts.
- 9
Join the black tiles on a flat surface
Arrange the silhouette face down over the full-size paper proof. Align border edges and overlap marks, then secure only the hidden black overlaps with narrow strips of acid-free tape. Do not bridge open cutouts with adhesive. Turn the joined silhouette over and inspect the seams under strong side light before continuing.
- 10
Build a lightweight perimeter frame
Cut four foam-board or corrugated-plastic strips to fit behind the outer black border. Dry-fit square corners, then join the strips with the material maker's approved tape or adhesive. Add reinforced hanging tabs at the planned suction points. Keep the frame flat and avoid a heavy wood, glass, or metal backing that could overload removable mounts.
- 11
Attach the vellum and silhouette
Tape the vellum tiles to the rear of the black silhouette with adhesive hidden behind broad black areas. Leave small expansion gaps instead of pulling vellum tight. Center the layered paper on the front of the frame and secure the border at frequent intervals. Let the adhesive settle flat for the maker's recommended time under clean, light weights if permitted.
- 12
Load-test the removable mounts
Clean and dry the glass only as its maker directs. Install suction cups according to their instructions, attach the empty frame, and test it over a padded surface for at least the mount maker's recommended period. Then add the paper panel and repeat the test. Use additional rated mounts if allowed; never exceed a mount's stated load or rely on one cup.
- 13
Position battery lighting separately
Place cool-running battery puck lights or a light bar on a stable surface behind the display, aimed toward the wall or vellum for reflected glow. Maintain every clearance required by the light maker and keep the lights, battery case, wiring, and switch completely separate from the paper, frame, glass, curtains, and suction hardware. Do not tape lights to the panel.
- 14
Inspect, display, and store
View the finished panel from outside after dark and reposition the separate lights if the glow is uneven. Turn lighting off whenever the display is unattended. Check suction cups, clips, frame joints, paper, vellum, glass, condensation, and battery housing before every use. At season's end, remove the panel with two hands and store it flat in a dry archival box.
Practical finishing tips
- A single large face with a thick hat and collar reads better across the street than several small character silhouettes.
- Hide tile seams inside solid black hair, clothing, or border areas so backlighting cannot outline the overlaps.
- Use the same cardstock batch for every black tile; small finish differences become obvious when a light shines behind them.
- Add simple diamond and star openings around the figure only after the main silhouette has passed its smallest-detail test cut.
- Number the back of every tile, vellum section, frame side, and storage tissue so repairs are easier next season.
- Take a daylight photo of the installed suction points before removing the display, creating an easy placement guide for reuse.
Troubleshooting
Stop cutting the full panel, enlarge the design, thicken bridges, remove the smallest openings, check the mat and blade, and repeat the detail test. Do not compensate for fragile geometry with extra adhesive across visible cutouts.
Add a narrow black cardstock patch behind the seam, extending onto solid black areas on both sides. Keep patches out of translucent openings and use the smallest amount of compatible tape needed to hold them flat.
Release any section stretched too tightly, let it relax flat, and reattach it from one edge with small hidden tape tabs. Replace badly creased vellum; heat, steam, or ironing can damage paper and is unnecessary.
Remove the display immediately, support it with both hands, and inspect the glass, cup, load rating, temperature range, and cleaning method. Replace damaged hardware or switch to a manufacturer-approved mechanical mounting method; never keep adding weight to a failing cup.
Increase the size of the eye, mouth, collar, and hat openings in the source file, reduce surrounding decorative cutouts, or move the separate lights farther back for a broader wash. Recut the affected tile rather than cutting the installed panel by hand.
Turn off and remove the display and lighting, dry the area as the window maker directs, and address the moisture source before reinstalling. Damp paper can sag, stain, grow mold, and increase the chance of a mount releasing.
Ways to make it yours
Use one simplified head-and-hat silhouette on a single mat-sized sheet with a plain rectangular border and no tiled seams.
Add large ticket-stub shapes, diamonds, and striped curtain panels around the clown while keeping every opening broad enough for the chosen cardstock.
Replace translucent vellum with orange cardstock and display the panel without lights for a bold paper-cut poster that reads in daylight.
Use white vellum behind matte black cardstock and rely on ordinary room light, creating a quiet black-and-cream look with no dedicated backlight.
Keep crafting
- DIY Horror Clown Movie-Night Party Kit — Make a coordinated horror movie-night set with snack boxes, drink decals, table cards, and a bold feature sign.
- DIY Horror Movie Ticket Stub Accordion Album With Cricut or Silhouette — Build a sturdy accordion album that turns horror-movie ticket stubs into a dramatic shelf display with fitted pockets and a vinyl-decorated cover.
- DIY Slasher Silhouette Luminary Village — Build a row of glowing paper luminaries with a different horror silhouette hidden in every window.
Inspiration & further reading
This is an original Klean Kut Halloween Crafts project inspired by approachable techniques shared across trusted craft and home sources. Explore Cricut cardstock instructions and Cricut machine material compatibility guide for more ideas and technique background.