
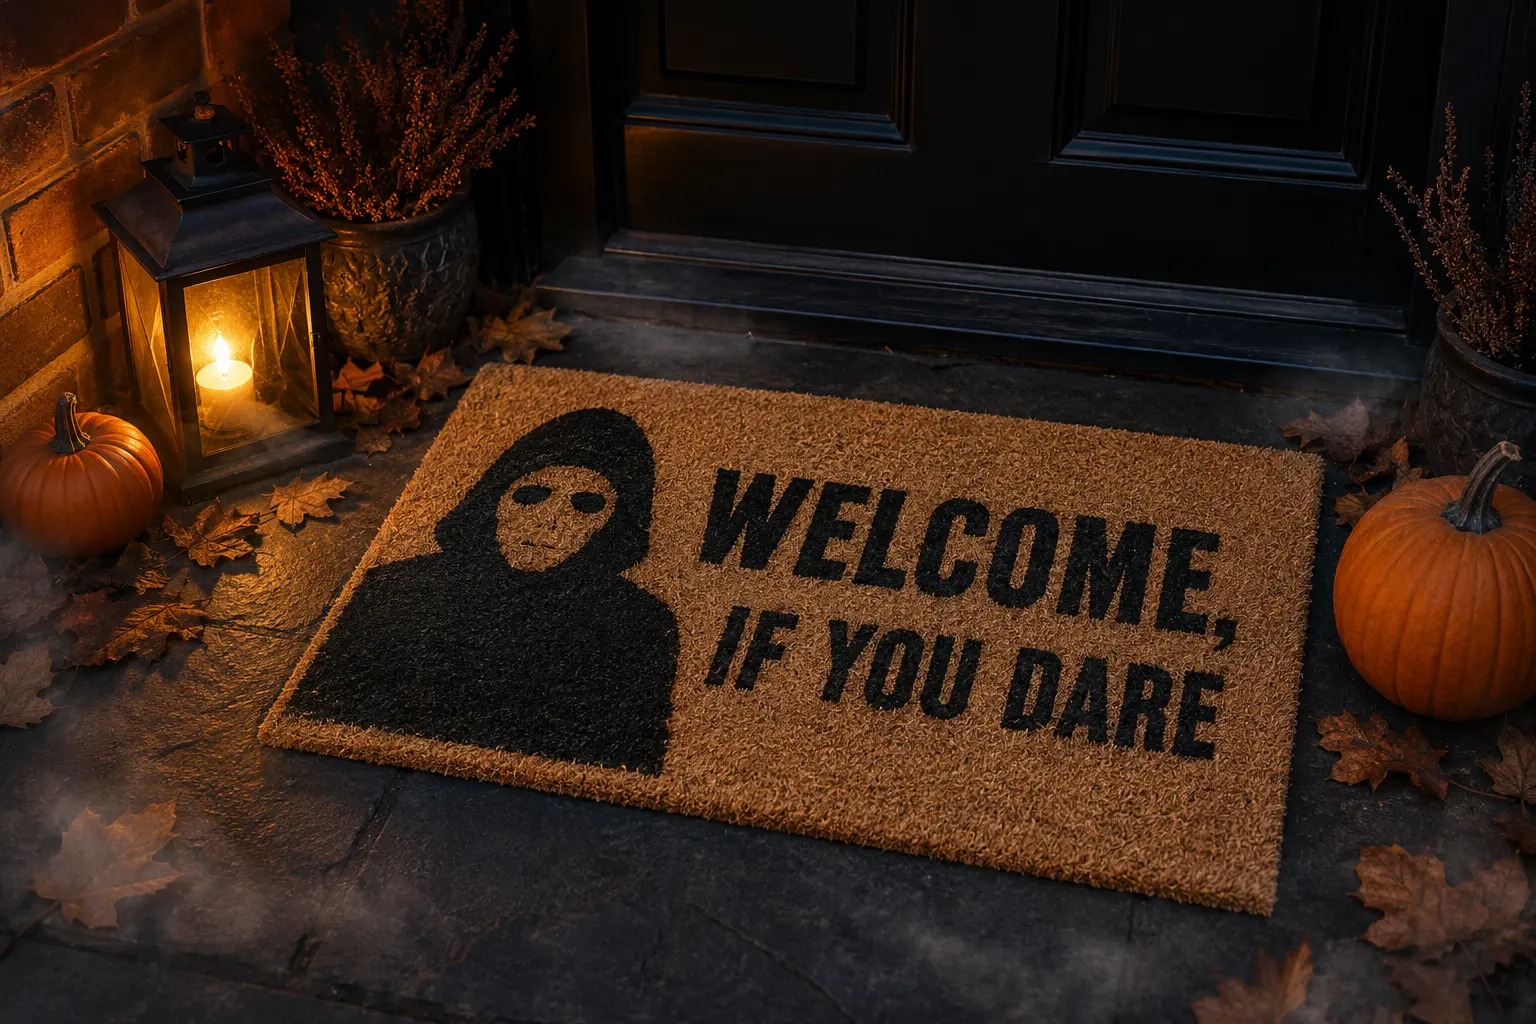
A coir doormat is already rough, graphic, and made for a strong silhouette. That makes it a natural base for a masked slasher design—as long as the artwork is enlarged, the stencil is secured carefully, and the paint is dabbed down into the uneven fibers instead of brushed sideways. The finished mat reads clearly from the sidewalk without needing blood, gore, or dozens of fragile details.
This is an original project plan built around a machine-cut stencil and common outdoor craft materials. Coir texture, stencil film, blades, paint, climate, and foot traffic all vary, so start with the material settings recommended for your exact cutting machine, test a small offcut or hidden corner, and treat the finished piece as seasonal decorative porch décor rather than a permanent architectural finish.
What you’ll need
- Plain natural coir doormat with a sound non-slip backing, about 18 by 30 inches
- Masked hooded slasher cut file from the featured KleanKutChaos listing
- Machine-compatible stencil film or heavyweight cardstock for a one-use stencil
- Cutting machine, blade recommended for the stencil material, mat, scraper, and weeding tool
- Plain paper for a full-size placement mockup
- Outdoor-rated black acrylic or porch paint suitable for fibrous surfaces
- Short, stiff stencil brush or small dense foam pouncer
- Painter’s tape, ruler, chalk pencil, and disposable palette
- A few T-pins or flat weights to hold the stencil against the coir
- Drop cloth, nitrile gloves, eye protection, and a small trash container
- Optional bold block-letter font added separately in the cutting software
How to make it
- 1
Check the mat before decorating
Lay the mat flat and inspect the backing, corners, and coir surface. Skip mats with cracked rubber, loose chunks, curled edges, or a shape that already slides on the intended porch. Vacuum or shake away loose fibers outdoors, then let the mat dry completely.
- 2
Plan one readable focal design
Measure the usable center and size the slasher silhouette roughly 12 to 16 inches tall on a standard 18-by-30-inch mat. Keep at least two inches of open space from the edges. If adding your own phrase, use broad block lettering and place it above or below the figure rather than crowding the knife or mask.
- 3
Convert the artwork into a practical stencil
Decide which cut areas will receive paint. Look for enclosed eyes, mask openings, or clothing details that would become loose stencil islands. Add small bridges in the cutting software or plan to place those pieces separately with tweezers. Remove details that become narrower than the coir fibers can display cleanly.
- 4
Make a full-size paper rehearsal
Cut or print the layout on inexpensive paper, tape the sections together, and center it on the mat. View it from several feet away. Confirm that the silhouette reads instantly, the knife is not lost against the edge, and any lettering is large enough to survive the coarse texture.
- 5
Run a stencil-material test cut
Use a small scrap of the exact stencil material and begin with the machine maker’s recommended setting. The material should cut cleanly without deeply scoring the mat beneath it. Adjust one variable at a time, then cut the full design only after the test weeds without tearing.
- 6
Weed and label every loose detail
Remove the areas that will be painted. Before lifting the stencil from its backing, mark the top edge and lightly number any separate mask or eye pieces on their removable backing. If the design spans multiple stencil panels, add registration marks well outside the painted artwork.
- 7
Secure the stencil to the coir
Center the stencil using the paper-test measurements. Press adhesive stencil film only as firmly as the material allows, tape all outer edges, and hold stubborn corners with flat weights or T-pins inserted sideways into the coir rather than through the backing. Count the pins so every one is removed later.
- 8
Build the black silhouette with dry vertical dabs
Load only a small amount of outdoor paint, tap off the excess, and pounce straight down from the stencil edge toward the open center. Do not sweep sideways. Build two or three light passes until the tan fibers are dark enough, allowing the paint to settle according to its label between passes.
- 9
Add optional wording as a separate pass
Let the main silhouette reach the paint maker’s stated recoat stage. Position the block-letter stencil using the same centerline measurements and repeat the dry-pouncing method. Keeping the lettering separate makes both stencils easier to secure and reduces accidental smears.
- 10
Lift the stencil and cure the mat
While the last coat is still at the stage recommended by the paint maker, lift the stencil straight up without dragging it across the fibers. Remove every pin, bridge, tape strip, and loose stencil piece. Touch up only obvious gaps with a nearly dry detail brush, then leave the mat flat and protected for the full drying and curing time on the paint label before placing it outside.
Practical finishing tips
- Photograph the paper mockup with a ruler beside it so the final centerline and spacing are easy to reproduce.
- A larger, simpler silhouette usually looks more expensive on coir than a small design packed with thin interior lines.
- Keep the brush nearly dry at the stencil edge; add coverage in the center only after the outline is established.
- If adhesive stencil film refuses to grip the fibers, stop pressing harder and switch to a rigid cardstock or reusable stencil held with tape, weights, and carefully counted pins.
- For a product you plan to sell, confirm the cut file and any added font both include the commercial rights your use requires.
Troubleshooting
Too much paint, a loose stencil, or sideways brushing is usually responsible. Blot the brush almost dry, secure the stencil closer to the opening, and pounce vertically. Let minor fuzziness remain; overworking wet coir often makes it worse.
Do not flood the area. Let the first light pass settle, then add another vertical pounced coat. Coir is naturally uneven, so a little texture is normal and helps the mat look handmade rather than printed.
Enlarge the design, widen the stencil bridges, or omit the smallest lines. Restore only one or two essential details later with a nearly dry small brush instead of trying to preserve every original cut at doormat scale.
Pause painting, replace any wet tape, and add flat weights outside the artwork. For a multi-panel stencil, finish and lift one panel before aligning the next with the registration marks.
Move it to a flat, shaded, dry surface and allow the backing and paint to finish curing. If the backing remains distorted or the edges create a trip hazard, do not place it in a walkway.
Ways to make it yours
Use only the oversized hooded silhouette with no wording for a cleaner, year-round horror-fan look.
Add a broad black border with crisp mitered corners, leaving a generous tan gap around the slasher so the figure remains readable.
Mount a lightweight decorative coir panel vertically in a sheltered mudroom and reduce foot traffic, but still use secure hardware and outdoor-rated paint.
Reuse the simplified stencil on a primed wood round, following the paint and stencil instructions for that surface rather than assuming the coir settings transfer directly.
Keep crafting
- DIY Slasher Silhouette Luminary Village — Build a row of glowing paper luminaries with a different horror silhouette hidden in every window.
- DIY Horror Clown Movie-Night Party Kit — Make a coordinated horror movie-night set with snack boxes, drink decals, table cards, and a bold feature sign.
Inspiration & further reading
This is an original Klean Kut Halloween Crafts project inspired by approachable techniques shared across trusted craft and home sources. Explore Cricut’s material-selection cheatsheet, Cricut’s wood-sign preparation guide and EPA guidance on volatile organic compounds for more ideas and technique background.